Pi Breaker
ECE 5725 Final Project
Dilan Lakhani (djl357), Stephen Zakoworotny (sjz38)
12/8/22
Demonstration Video
Project Objective
The objective of this project was to create a brick breaker game that can run on the Raspberry Pi, called PiBreaker. With the attached TFT screen and buttons on the Raspberry Pi, we figured that this would be the perfect form factor for a handheld video game. In PiBreaker, a player can progress through ten increasingly challenging levels to beat the game. After implementing the basic game, we added several features that made the game more exciting and competitive, like a high score tracker and powerups.
Introduction
Our goal was to recreate the famous brick breaker game from scratch using pygame. Brick breaker is a fast-paced game where the player moves a paddle left and right in order to hit a ball before it falls off screen. The player must carefully position the paddle to direct the ball towards bricks at the top of the screen. When the ball makes contact with a brick, the brick is destroyed. Each level is completed only when all bricks have been broken. Players can run the game on the Raspberry Pi embedded system using the onboard TFT buttons for control. We wanted to stay true to the classic game; however, we also added several unique powerups to make the game more fun and to allow users to strategize about how best to complete a level.
Design and Testing
Most of the work in our project involved designing the software. We took a very incremental approach to building up each module, and implemented the basic game before adding any additional functionality. The first step was to initialize bricks that would make up a level. There are several important attributes that need to be tracked per brick, like the x and y coordinates, the color, and the pygame Rect object that would be drawn on the TFT. Additionally, we wanted to make it simple to add attributes for each brick to enable greater functionality later in the project. Thus, we decided to create an extensible Bricks class, that held the necessary attributes. Then, we created Brick instances and added them to a list, generating a Rect pygame object for each brick. The Rect object takes in the top left coordinate and the height and width of each brick. In order to render each brick on the TFT, we looped through the bricks list and called the pygame.draw.rect function on each brick. We tested this portion of the code by running it on the Pi (Figure 1).
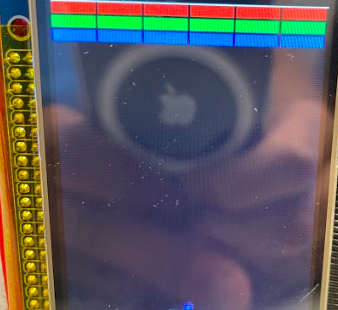
Figure 1: Drawing initial bricks
Once we generated all the bricks, the next step was to add a ball that could break bricks. We utilized our code from Lab 2 to get started with making a ball move on the screen. This involved moving the ball a certain distance in pixels before updating the frame. The x and y distances the ball moves determines how fast the ball appears to move, so we refer to them as the x and y speeds. We also need to check if the ball coordinates go outside the screen boundaries. If the ball moves past the top or bottom of the screen, the ball’s speed in the y direction is reversed. Thus, in the next frame the ball would move back towards the center of the screen. If the ball moves past the left or right of the screen, the sign of the x direction speed is flipped. Effectively, this makes it look like the ball is bouncing off the “walls” of the TFT. The ball movement and collision checking needs to happen continuously in the game. Thus, we implement a main loop that performs these functions, and we call it the gameplay loop. This loop will eventually contain all of the logic for playing the actual brick breaker game.
Once we completed this step, we began looking into collisions with the bricks. When a ball collides with a brick, two things need to happen. First, the brick needs to be removed from the screen. Second, the ball needs to bounce off the brick in a trajectory that physically makes sense. Accomplishing the first function is simple, as we just need to remove the brick from the overall bricks list. Since we redraw the whole bricks list within the gameplay loop, in the next loop iteration the removed brick will not be drawn. To create a realistic ball bounce, we check for three conditions. First, if the ball is moving upwards (the y speed is negative) and the ball’s center is below the bottom of the brick, we know that the ball collided with the bottom of the brick. Thus, we just need to reverse the y speed. Likewise, if the ball is moving downwards (the y speed is positive) and the ball’s center is above the top of the brick, we also reverse the y speed. If we do not satisfy either of the above conditions, we know the ball hit either side of the brick. Thus, we just need to reverse the ball’s speed in the x direction.
When we first implemented ball-brick collisions, we did not include a check for if the ball is moving in a certain direction when a collision occurs. This introduced problems in situations like Figure 2. Here, the ball is moving downwards and collides with a brick. The ball’s center is below the bottom of the brick, so originally this would count as a bottom collision and would reverse the ball’s y direction. This did not look natural, because there should be no way for the ball to hit the bottom of the brick. What we really want is to treat this as a side collision; thus, the additional direction check allows the code to fall through to the side collision logic. We thoroughly tested our ball-brick collision logic by designing different brick patterns and initializing a ball to bounce off the walls and bricks. For example, we created one column of bricks that made side collisions more likely. We also placed bricks sparsely on the screen so we could check that trajectories stayed realistic after multiple brick hits. This allowed us to be confident that our collision logic worked as intended.

Figure 2: Situation highlighting incorrect collision logic
At this point, the game consisted of a ball free-bouncing off all four walls waiting to collide with bricks to eliminate them. In order to incorporate a player into the game, we added a paddle that controls the trajectory of the ball. The player moves the paddle left and right across the bottom of the screen by pressing the buttons on the TFT display. We set up GPIO inputs attached to those buttons, allowing the gameplay loop to determine when a player moves the paddle. Now, we do not reflect the ball if it goes past the bottom of the screen; instead, this is a loss. Thus, the player must hit the ball with the paddle in order to send it back up towards the bricks. The paddle-ball logic is interesting, as it does not model physics. Instead, the paddle has the ability to send the ball upwards at different angles depending on which section of the paddle the ball hits. We had to carefully select certain parameters at this stage of the project. Within the gameplay loop, we had been moving the ball a maximum of four pixels in both the x and y directions each cycle. This provided smooth gameplay while being fast enough to be moderately challenging. However, this choice affects the resolution that we have for choosing ball angles. For example, if we choose a speed factor of four pixels, we can send the ball at nine total angles with the paddle: (-4,4), (-3,4), (-2,4), (-1,4), (0,4), (1,4), (2,4), (3,4), and (4,4), where the tuple represents the ball speed in the x and y directions. We wanted our paddle to allow a wide variety of angles. Thus, we tried to move the ball a maximum of eight pixels, which would give us 17 possible angles. However, we realized that the ball moved too far each cycle, and the ball visually seemed to travel inside a brick before rebounding. Thus, we decided to stick with moving the ball four pixels. Figure 3 breaks down the paddle sections, with a ball-paddle collision at each point sending the ball off at the specified speed in the x direction. Additionally, Figure 4, displays what the paddle looks like to the player at the start of a level.

Figure 3: Paddle Location Angles

Figure 4: Paddle at the start of a level
After implementing the paddle, we completed the basic brick breaker game. At this stage, a player could break bricks by carefully adjusting the paddle to catch the ball at the optimal launch angle. However, we wanted to add much more functionality to improve the user experience. We decided to keep track of the player’s score throughout the game and to display it at the top of the screen. To add competitiveness between multiple players, we also implemented a high score tracker placed next to the score display. Each brick counts as one point, and the score is updated within the gameplay loop. We want the high score to last beyond the termination of the brick breaker script. Thus, we store it in a file in the same directory as the script. If the score surpasses the high score, both the score and high score will update at the top of the screen. This made the game significantly more fun and the code changes went smoothly.
Next, we decided to enable each brick to withstand multiple collisions before breaking to make the game harder. We did this by adding a hits_to_break parameter to the Bricks class. When a collision is detected, the parameter is decremented. A brick is only removed from the bricks list if its hits_to_break parameter is zero. In order to visually distinguish between bricks that have been hit before, we gradually make the brick’s color darker. For example, in Figure 5, the blue row contains five blocks with two hits left, and one block with one hit left. When we first tried to add this functionality, anytime we hit a brick all other bricks of the same color would get darker. We realized that we needed to pass a copy of the RGB color list to each brick object, because we were passing a pointer to the list. This was causing any update to an individual brick’s color to actually update the color list, causing all the bricks to change color.
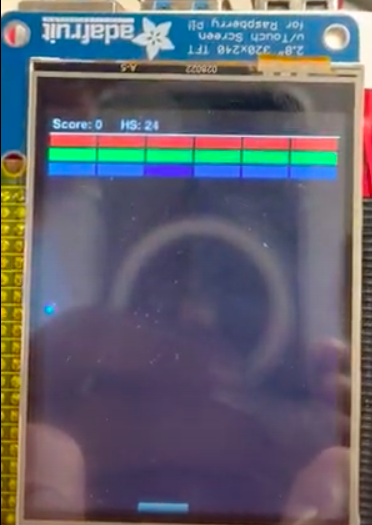
Figure 5: Brick color change after a single collision
While we played the game to test the previously added features, we realized that we would be able to make more creative levels by creating blocks that are unable to be broken. We call these wall blocks. To do this, we created a separate Wall class that mirrored the Bricks class; however, it did not have a hits_to_break field. The structure of our bricks list made it trivial to incorporate the new wall blocks. We just needed to add them to the list, and renamed it the blocks list to make it more general. The gameplay loop would iterate through each block in the list to draw it and check for collisions. We needed to add checks for if a collision occurred with a brick or a wall, because we would need to perform extra logic to decrement the hits_to_break parameter and potentially remove a brick from the list. We color wall blocks gray to distinguish them from bricks, as shown in Figure 6.
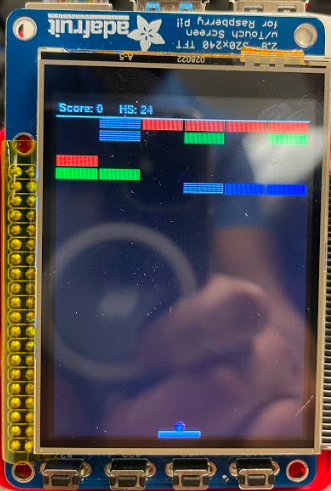
Figure 6: Gray wall blocks mixed in with bricks
At this stage, we had been manually changing the blocks anytime we wanted to experiment with a different level configuration. Thus, we wanted to add infrastructure to support different levels that we could select from. We did this by generalizing the blocks list into a 3D list. The outer list holds the layout of ten different levels. The middle list contains each row of the level. The inner list specifies each block within a row. Figure 7 shows a section of the new blocks list that specifies the first level. We can see that we only have six rows in the middle list; thus, no level can have more than six rows of blocks. We decided this was reasonable because placing blocks any lower on the screen would force the player to react too quickly to return the ball. Each letter denotes a different block: B is for brick, W is for wall, and S is for space. When iterating through the list in the gameplay loop, we skip any “S” instance. Thus, we are not forced to fill all six rows with bricks or walls.
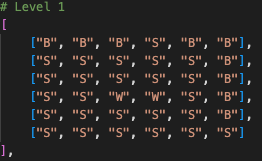
Figure 7: Level 1 in blocks list
Now that we could create multiple levels, we wanted to give the user an easy way to select the level they want to play. Thus, we decided to add a starting screen that is loaded when the program runs (Figure 8). This screen has three choices: Start, Level Selector, and Quit. The player can use the TFT buttons to navigate between the three choices and select one. Selecting “Start” will begin the game at Level 1. Pressing “Quit” completely exits the game.
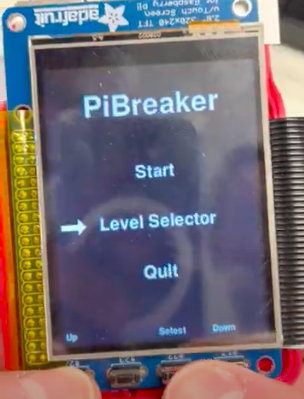
Figure 8: Starting screen
The “Level Selector” button brings the player to a second-level start screen that is shown in Figure 9. Here, the player can navigate between any of the ten levels, shown in Figures 10-19. This allows players to compete for a certain score on a single level, or to play their favorite levels without beating the previous ones. When designing the start screens, at first we did not bound the arrow selector icon to the lowest and highest options. This allowed the player to accidentally move the arrow off-screen if they pressed the buttons too many times. We fixed this by imposing a restriction that the arrow could not move higher than the highest option, or lower than the lowest option.
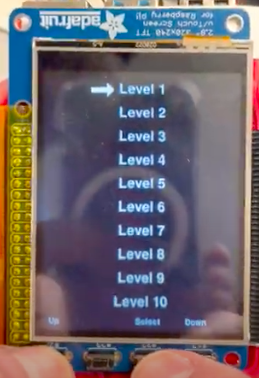
Figure 9: Level Selector screen
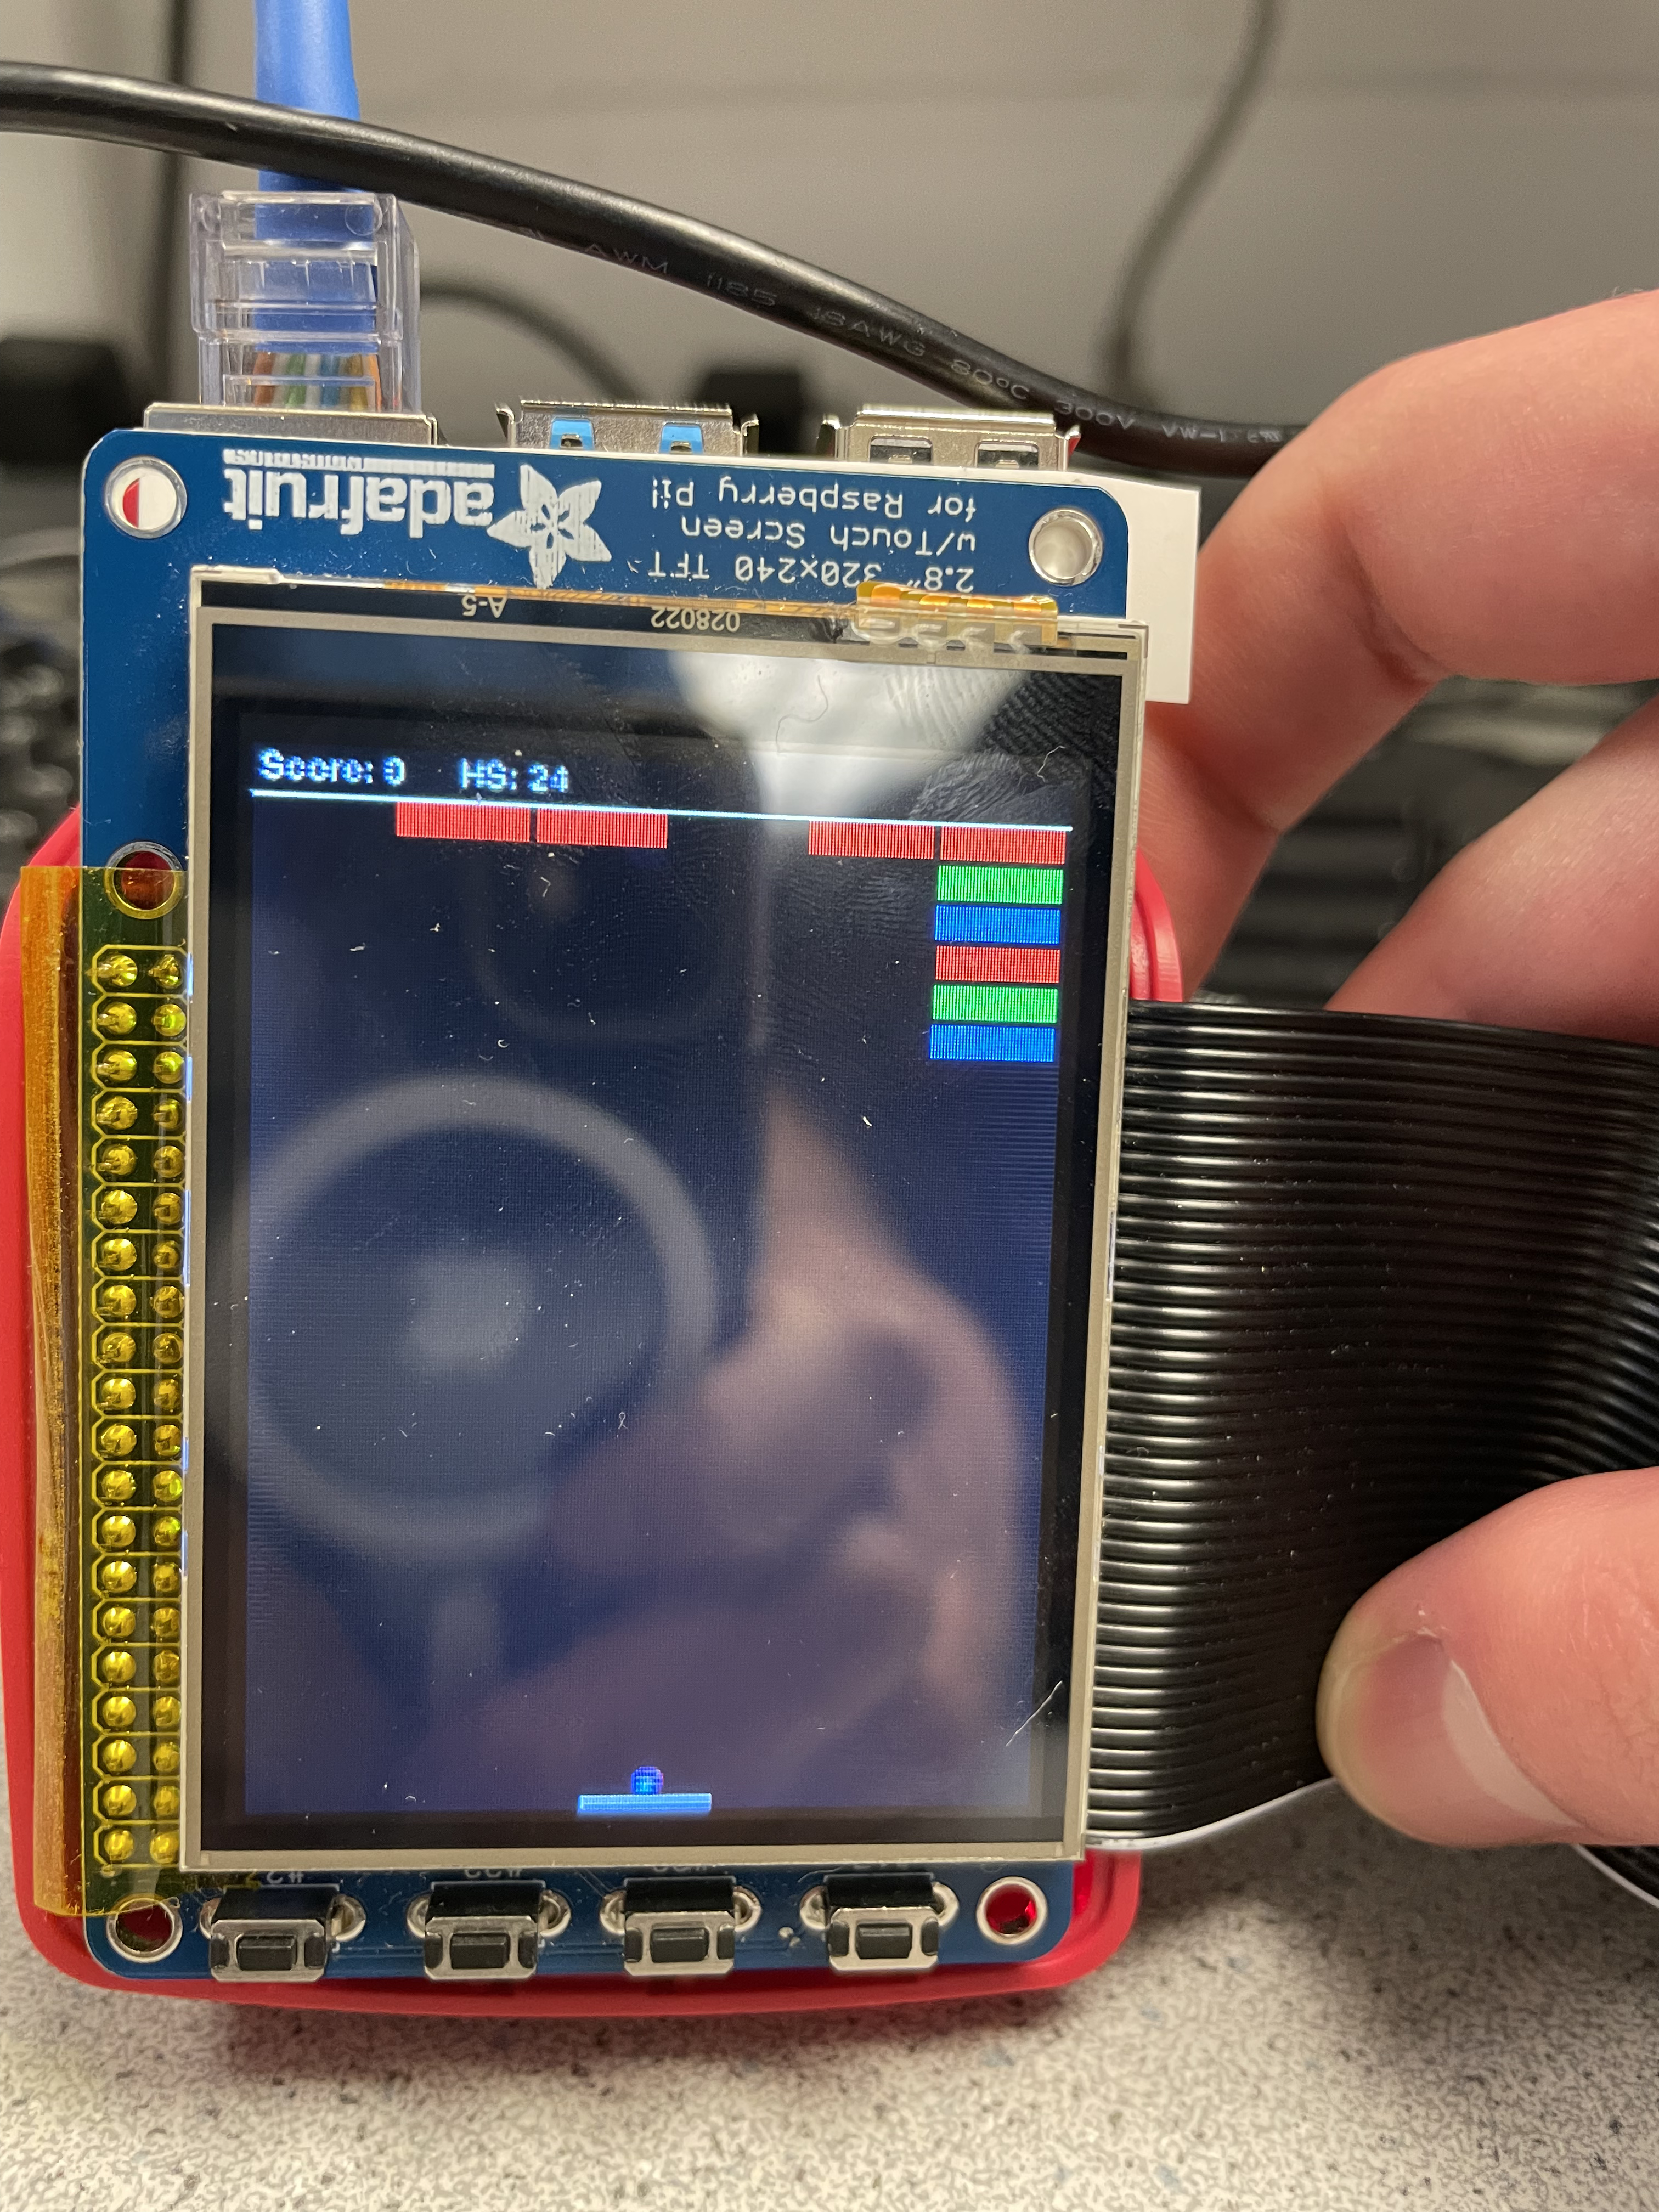
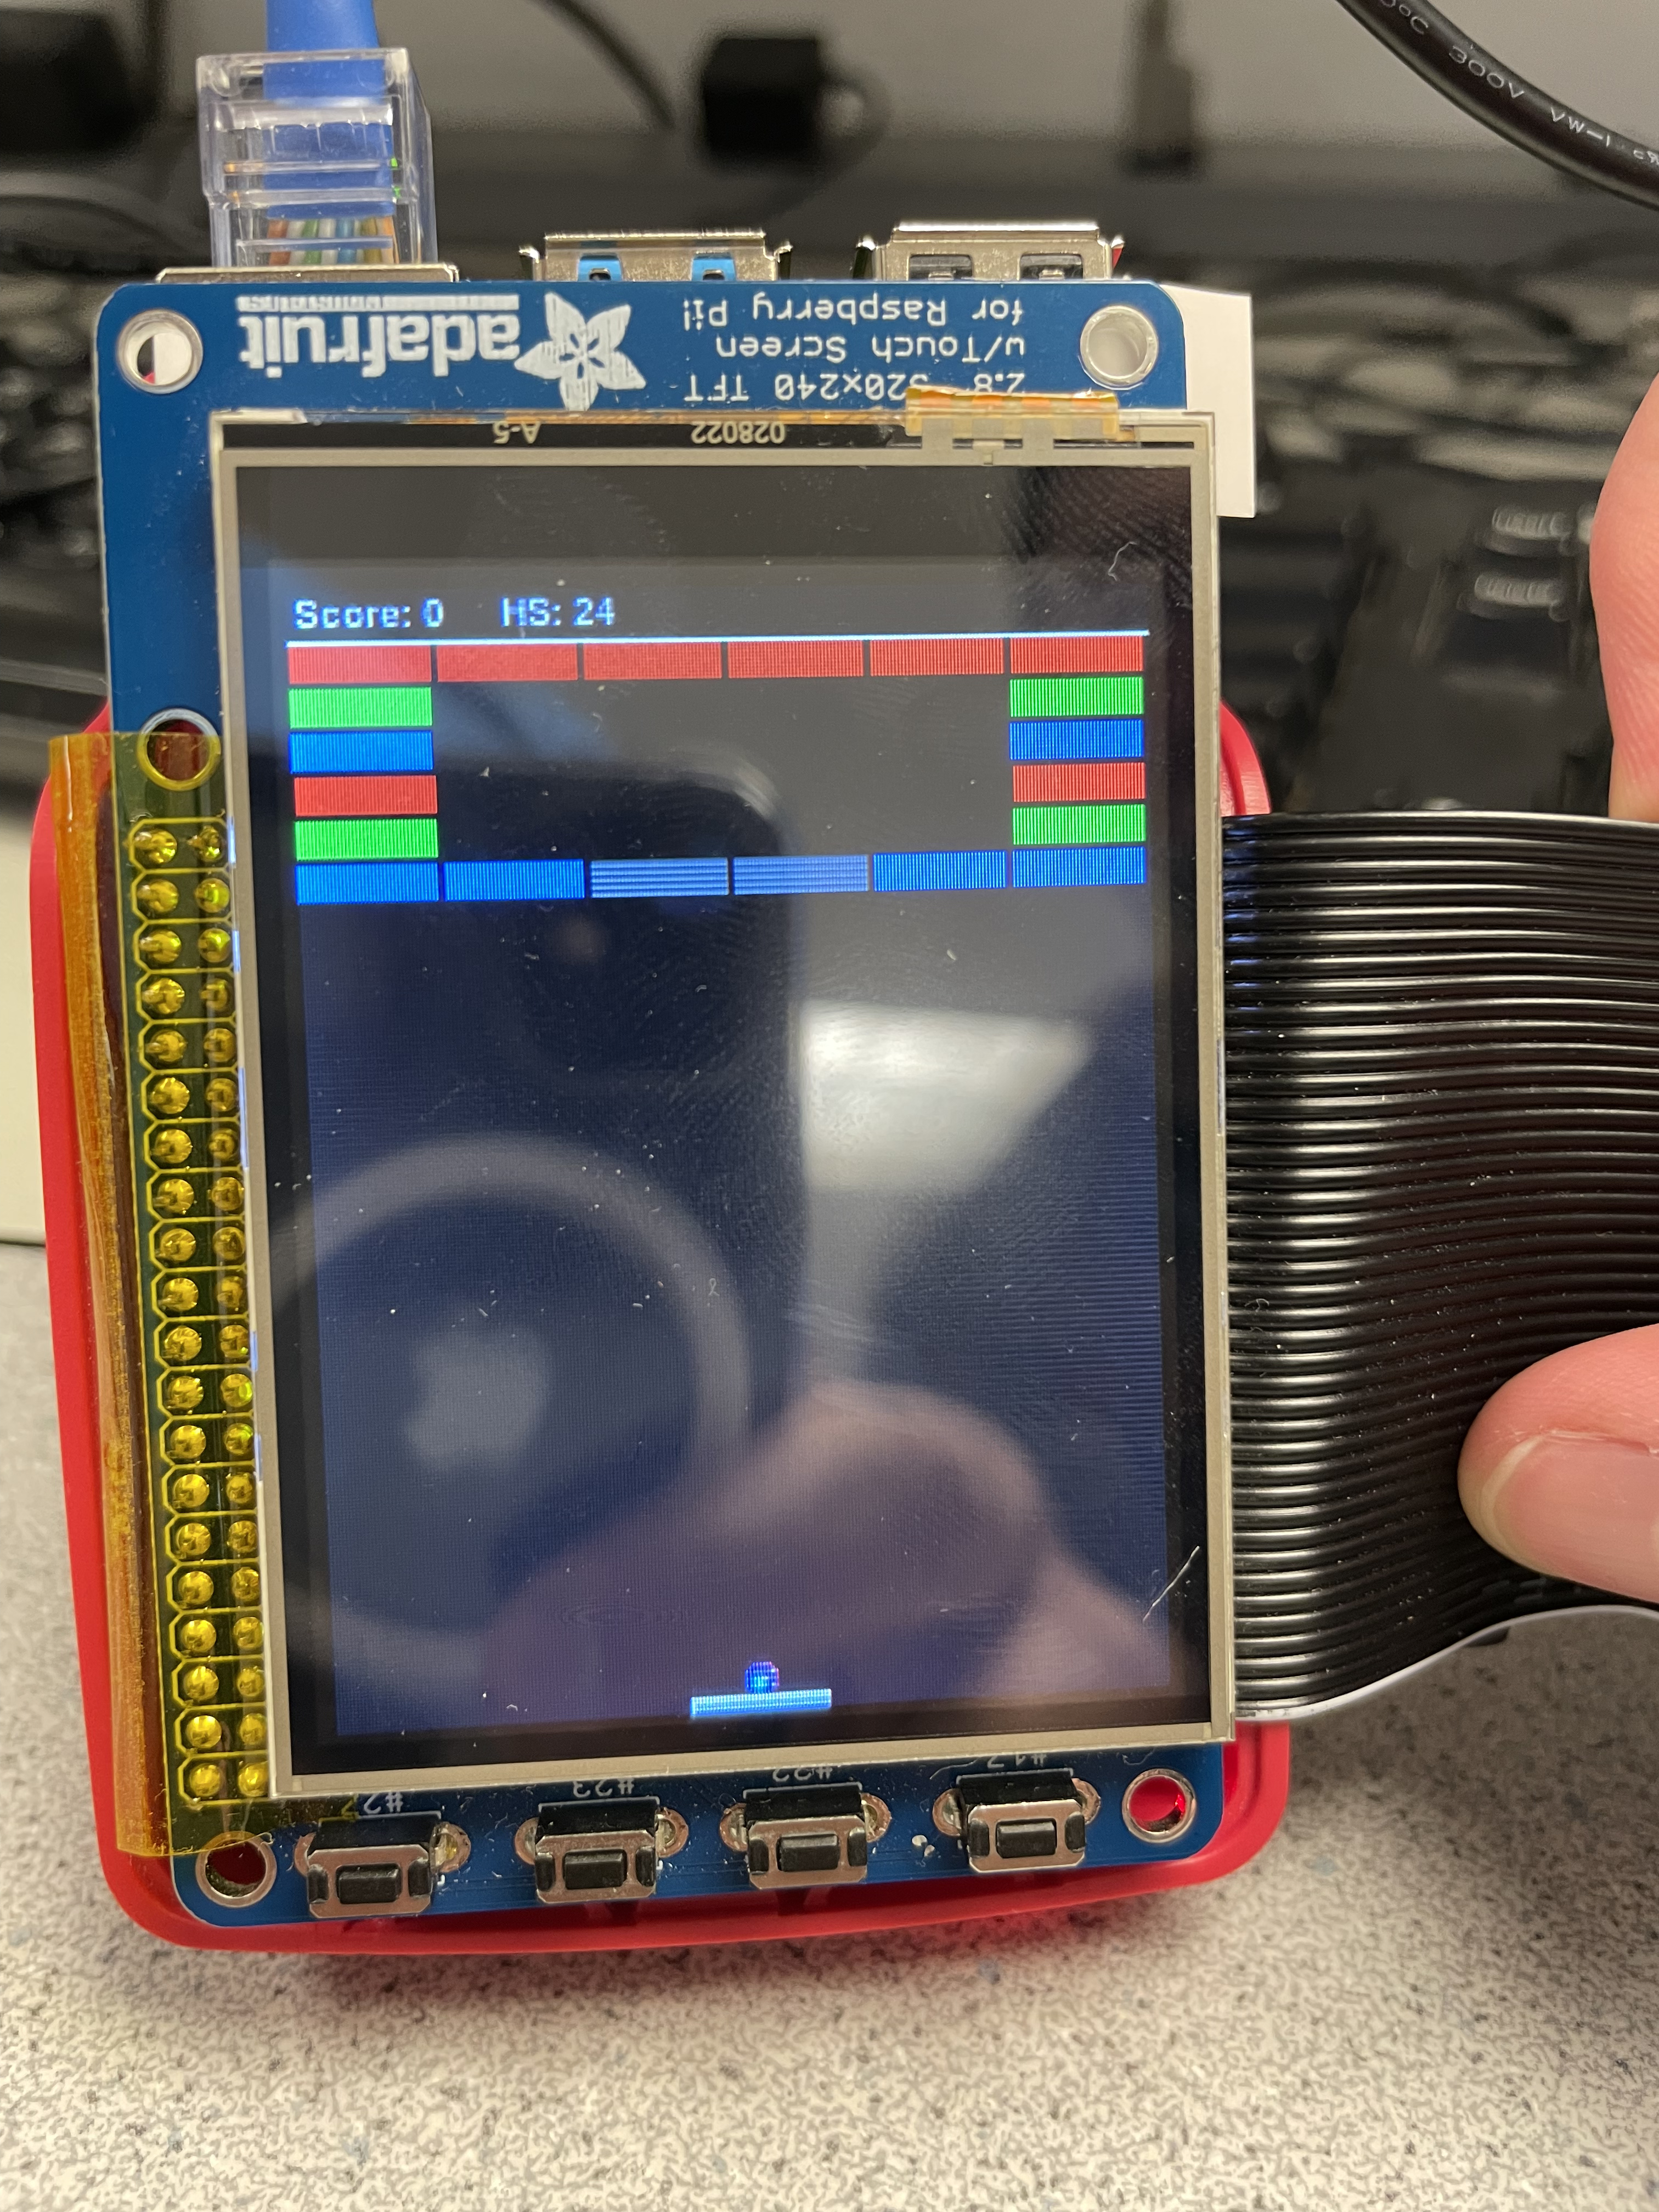
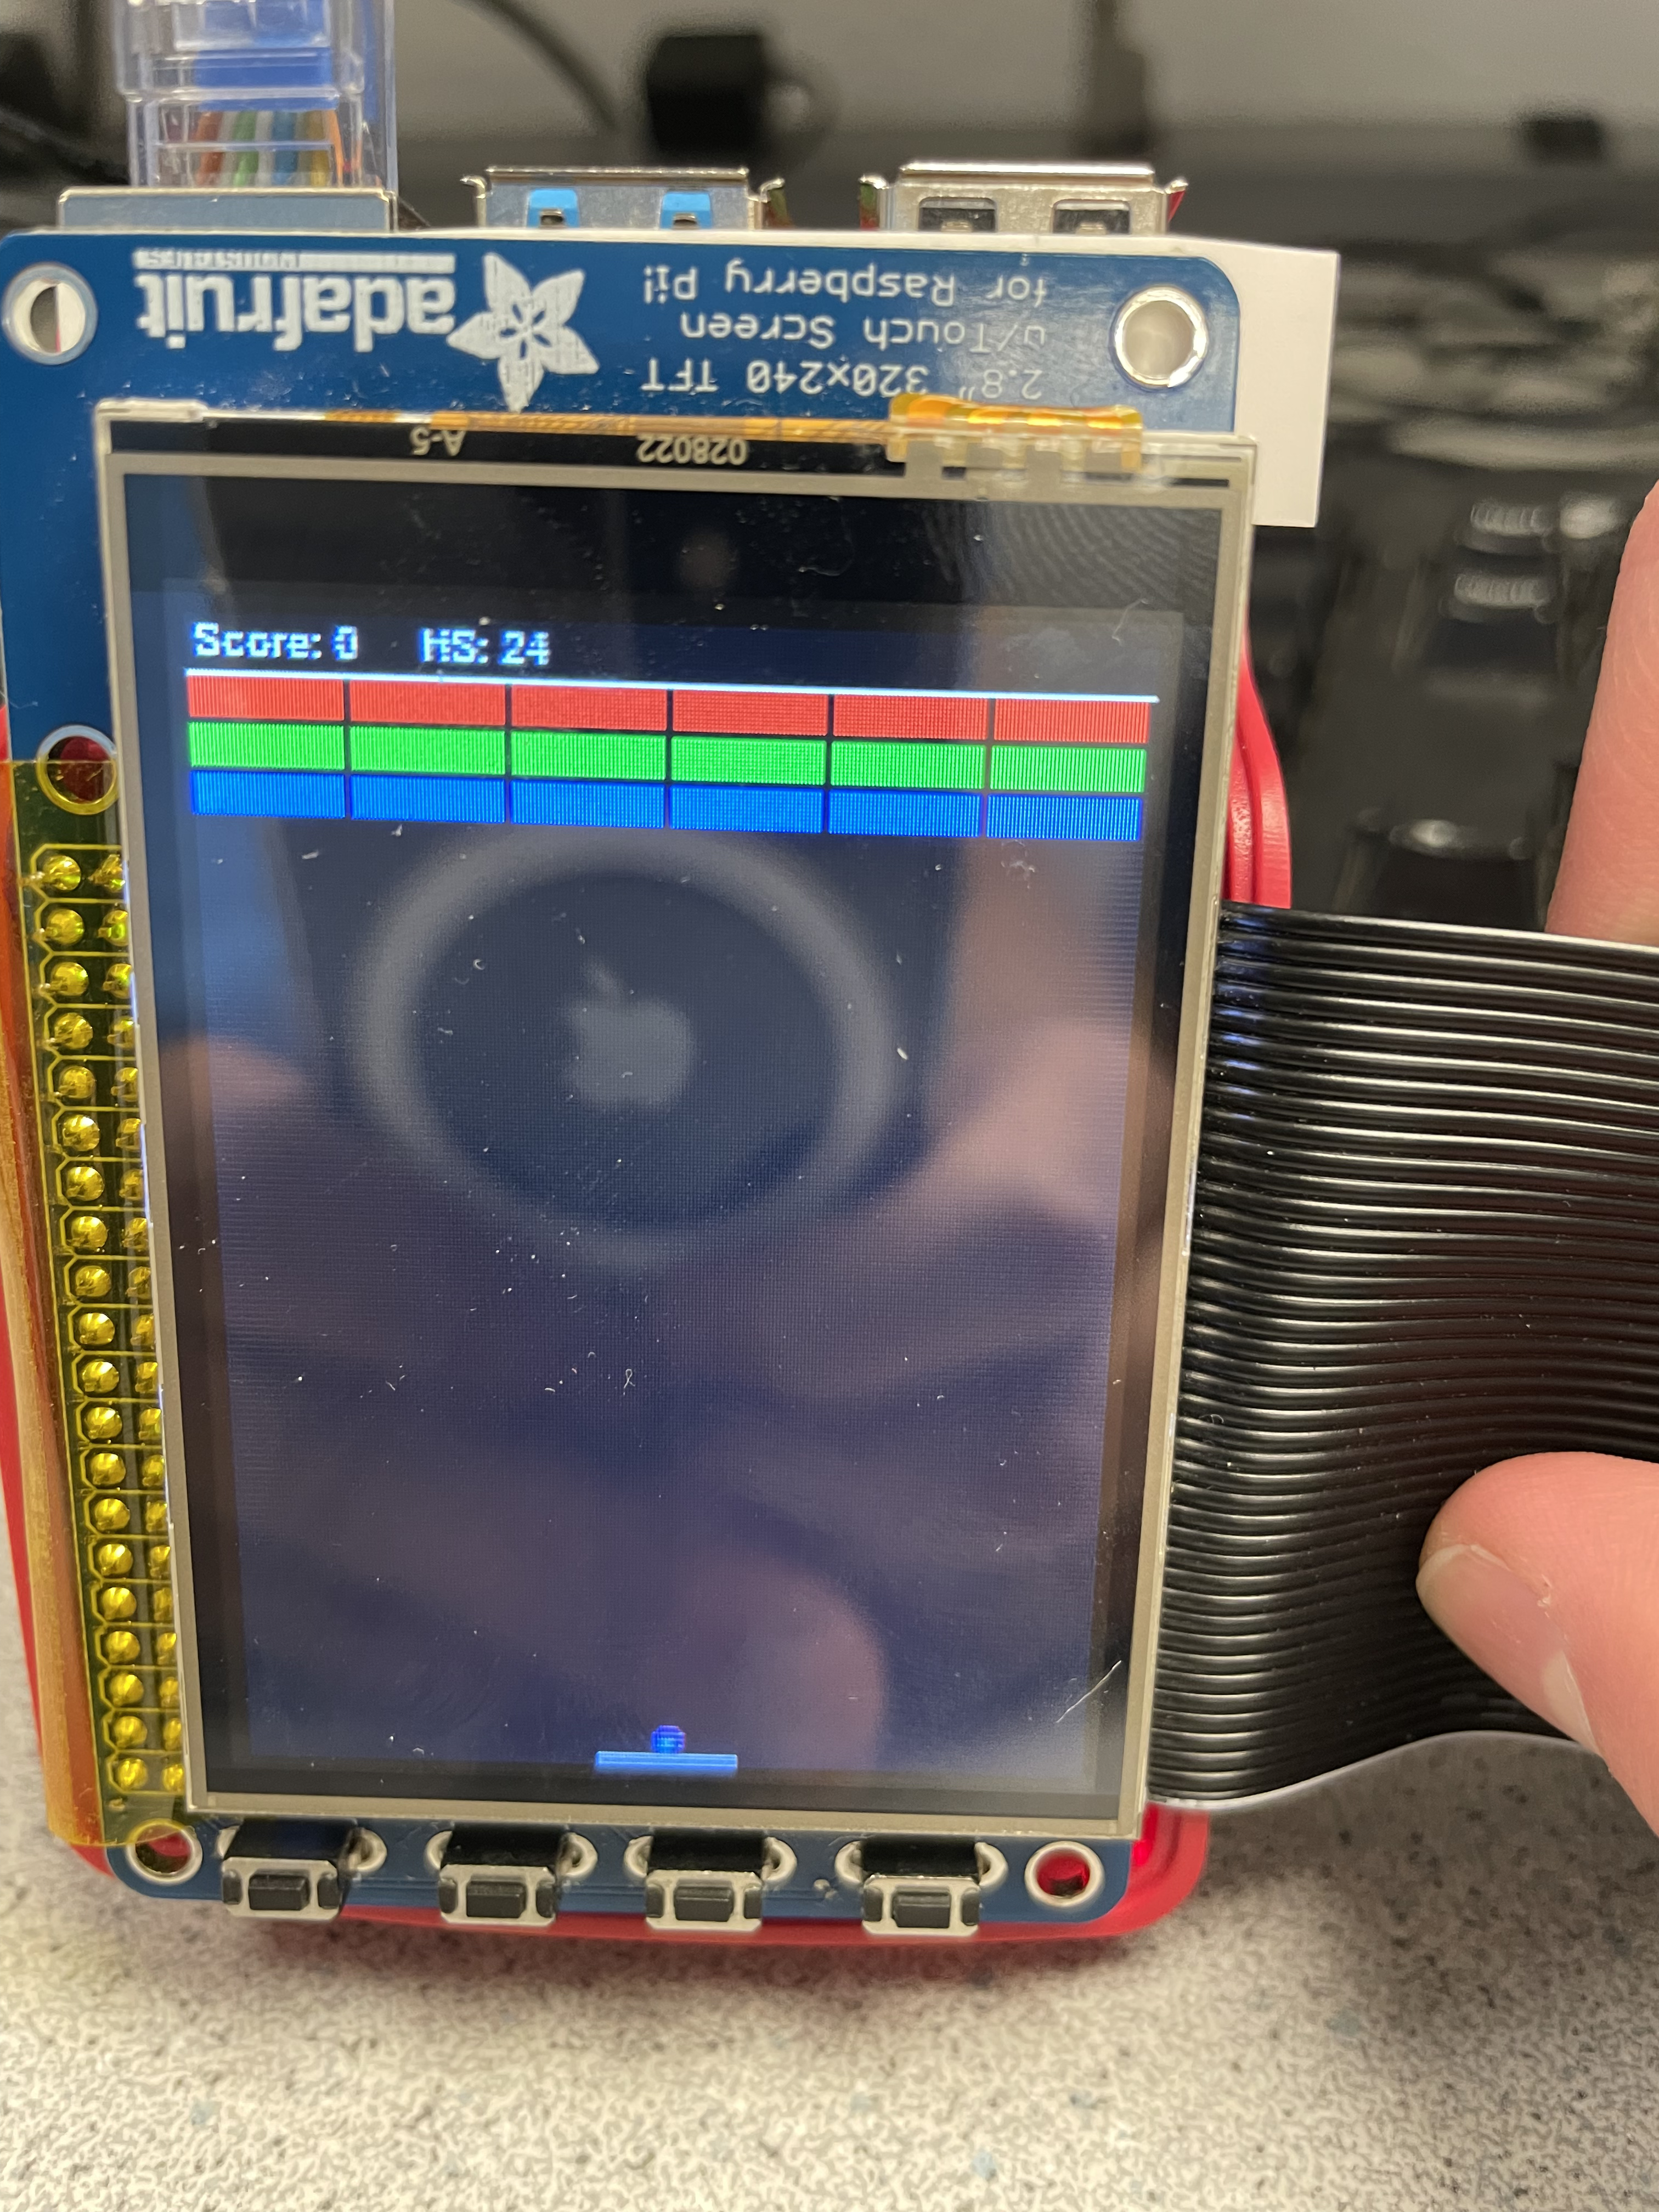
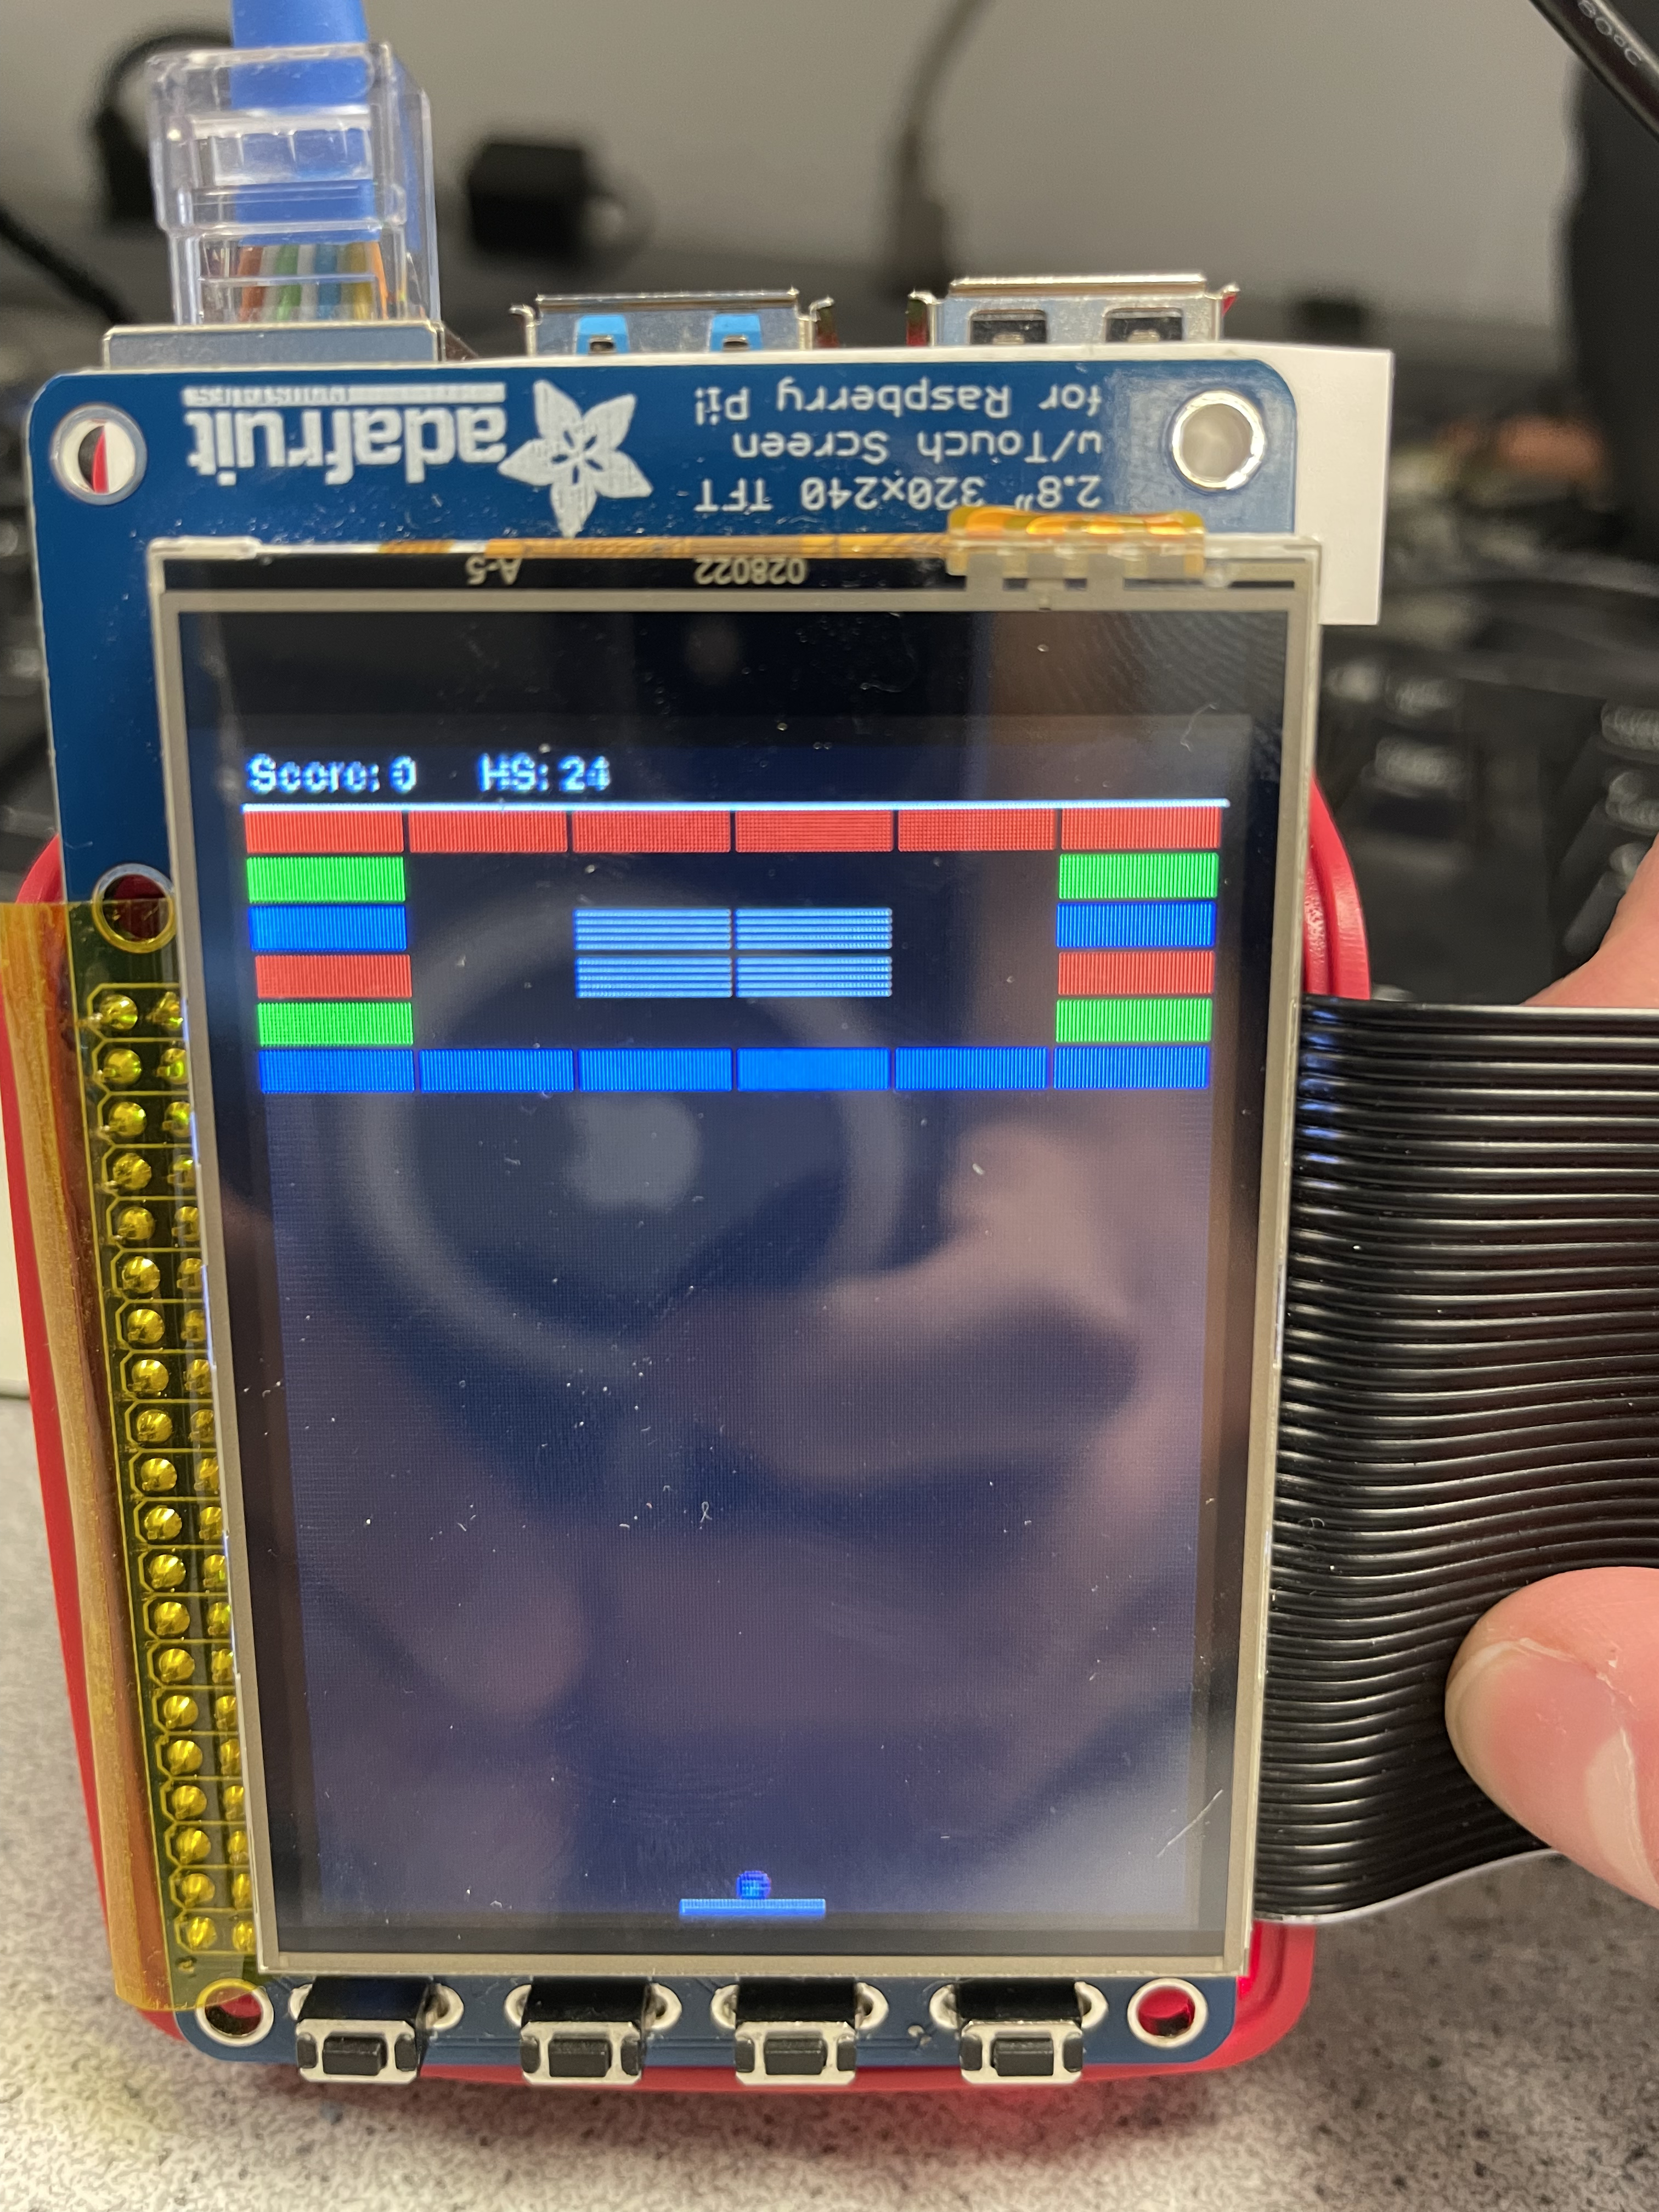
Figure 10-13: Levels 1-4
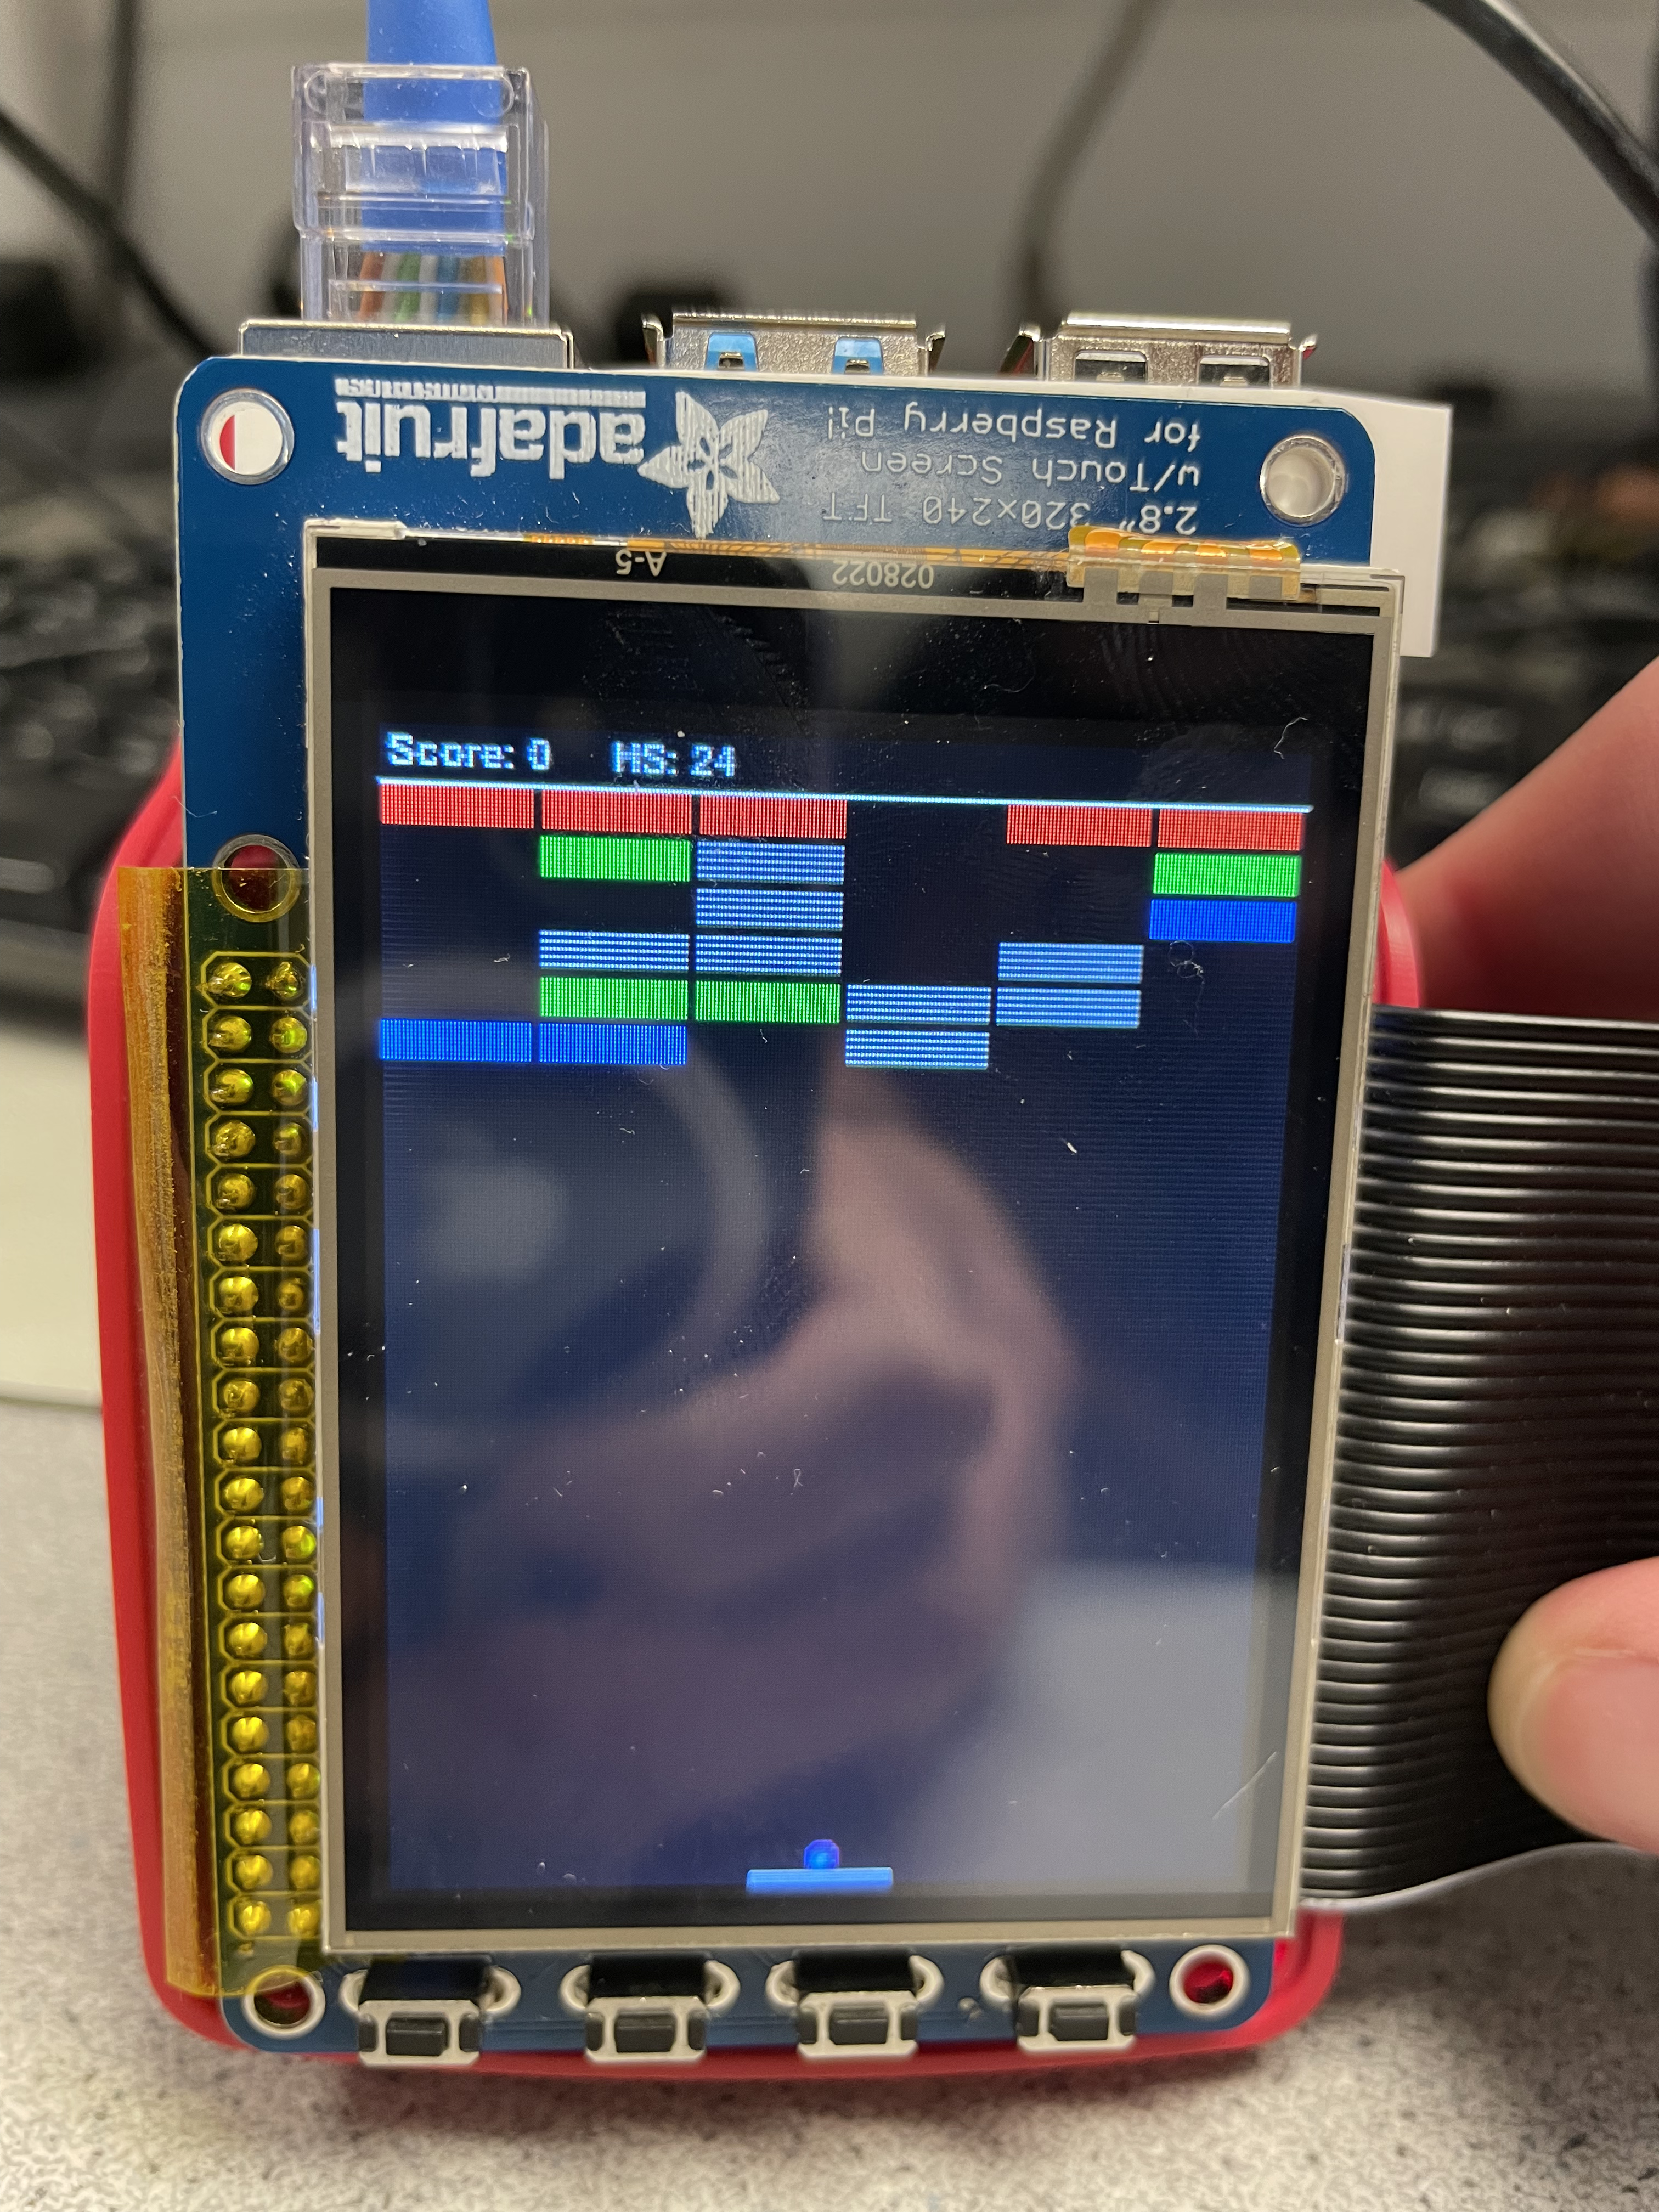
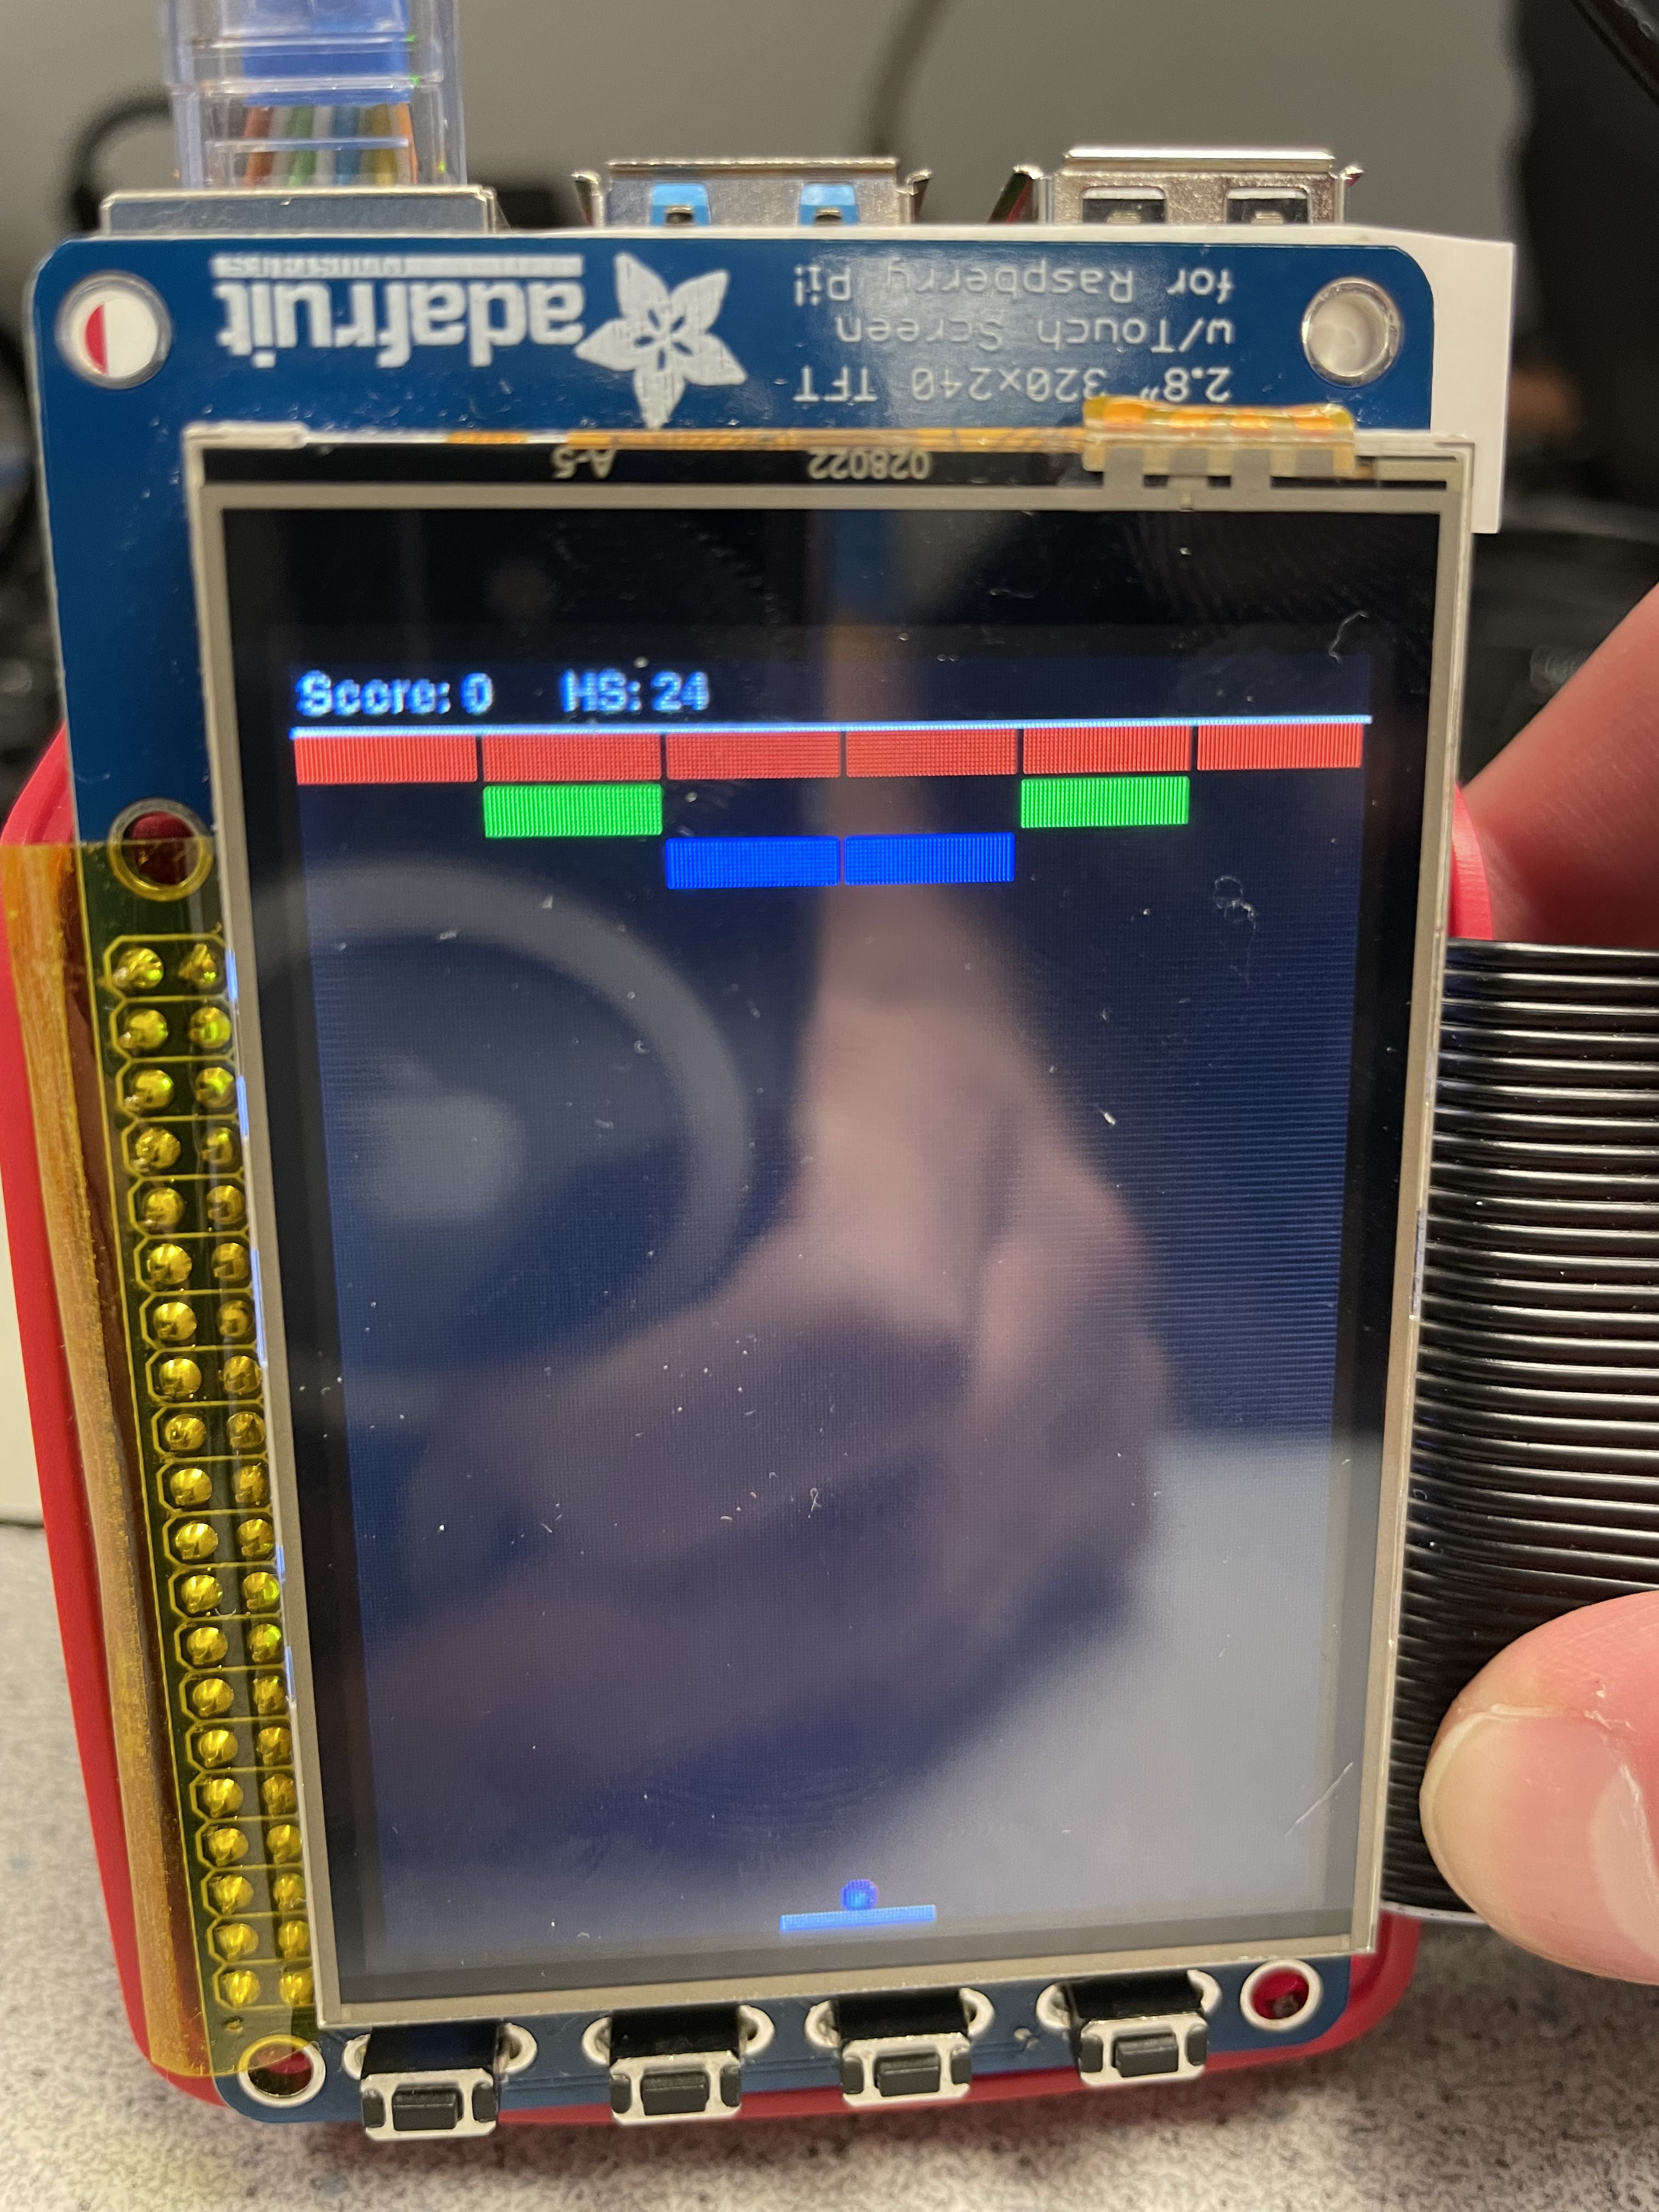
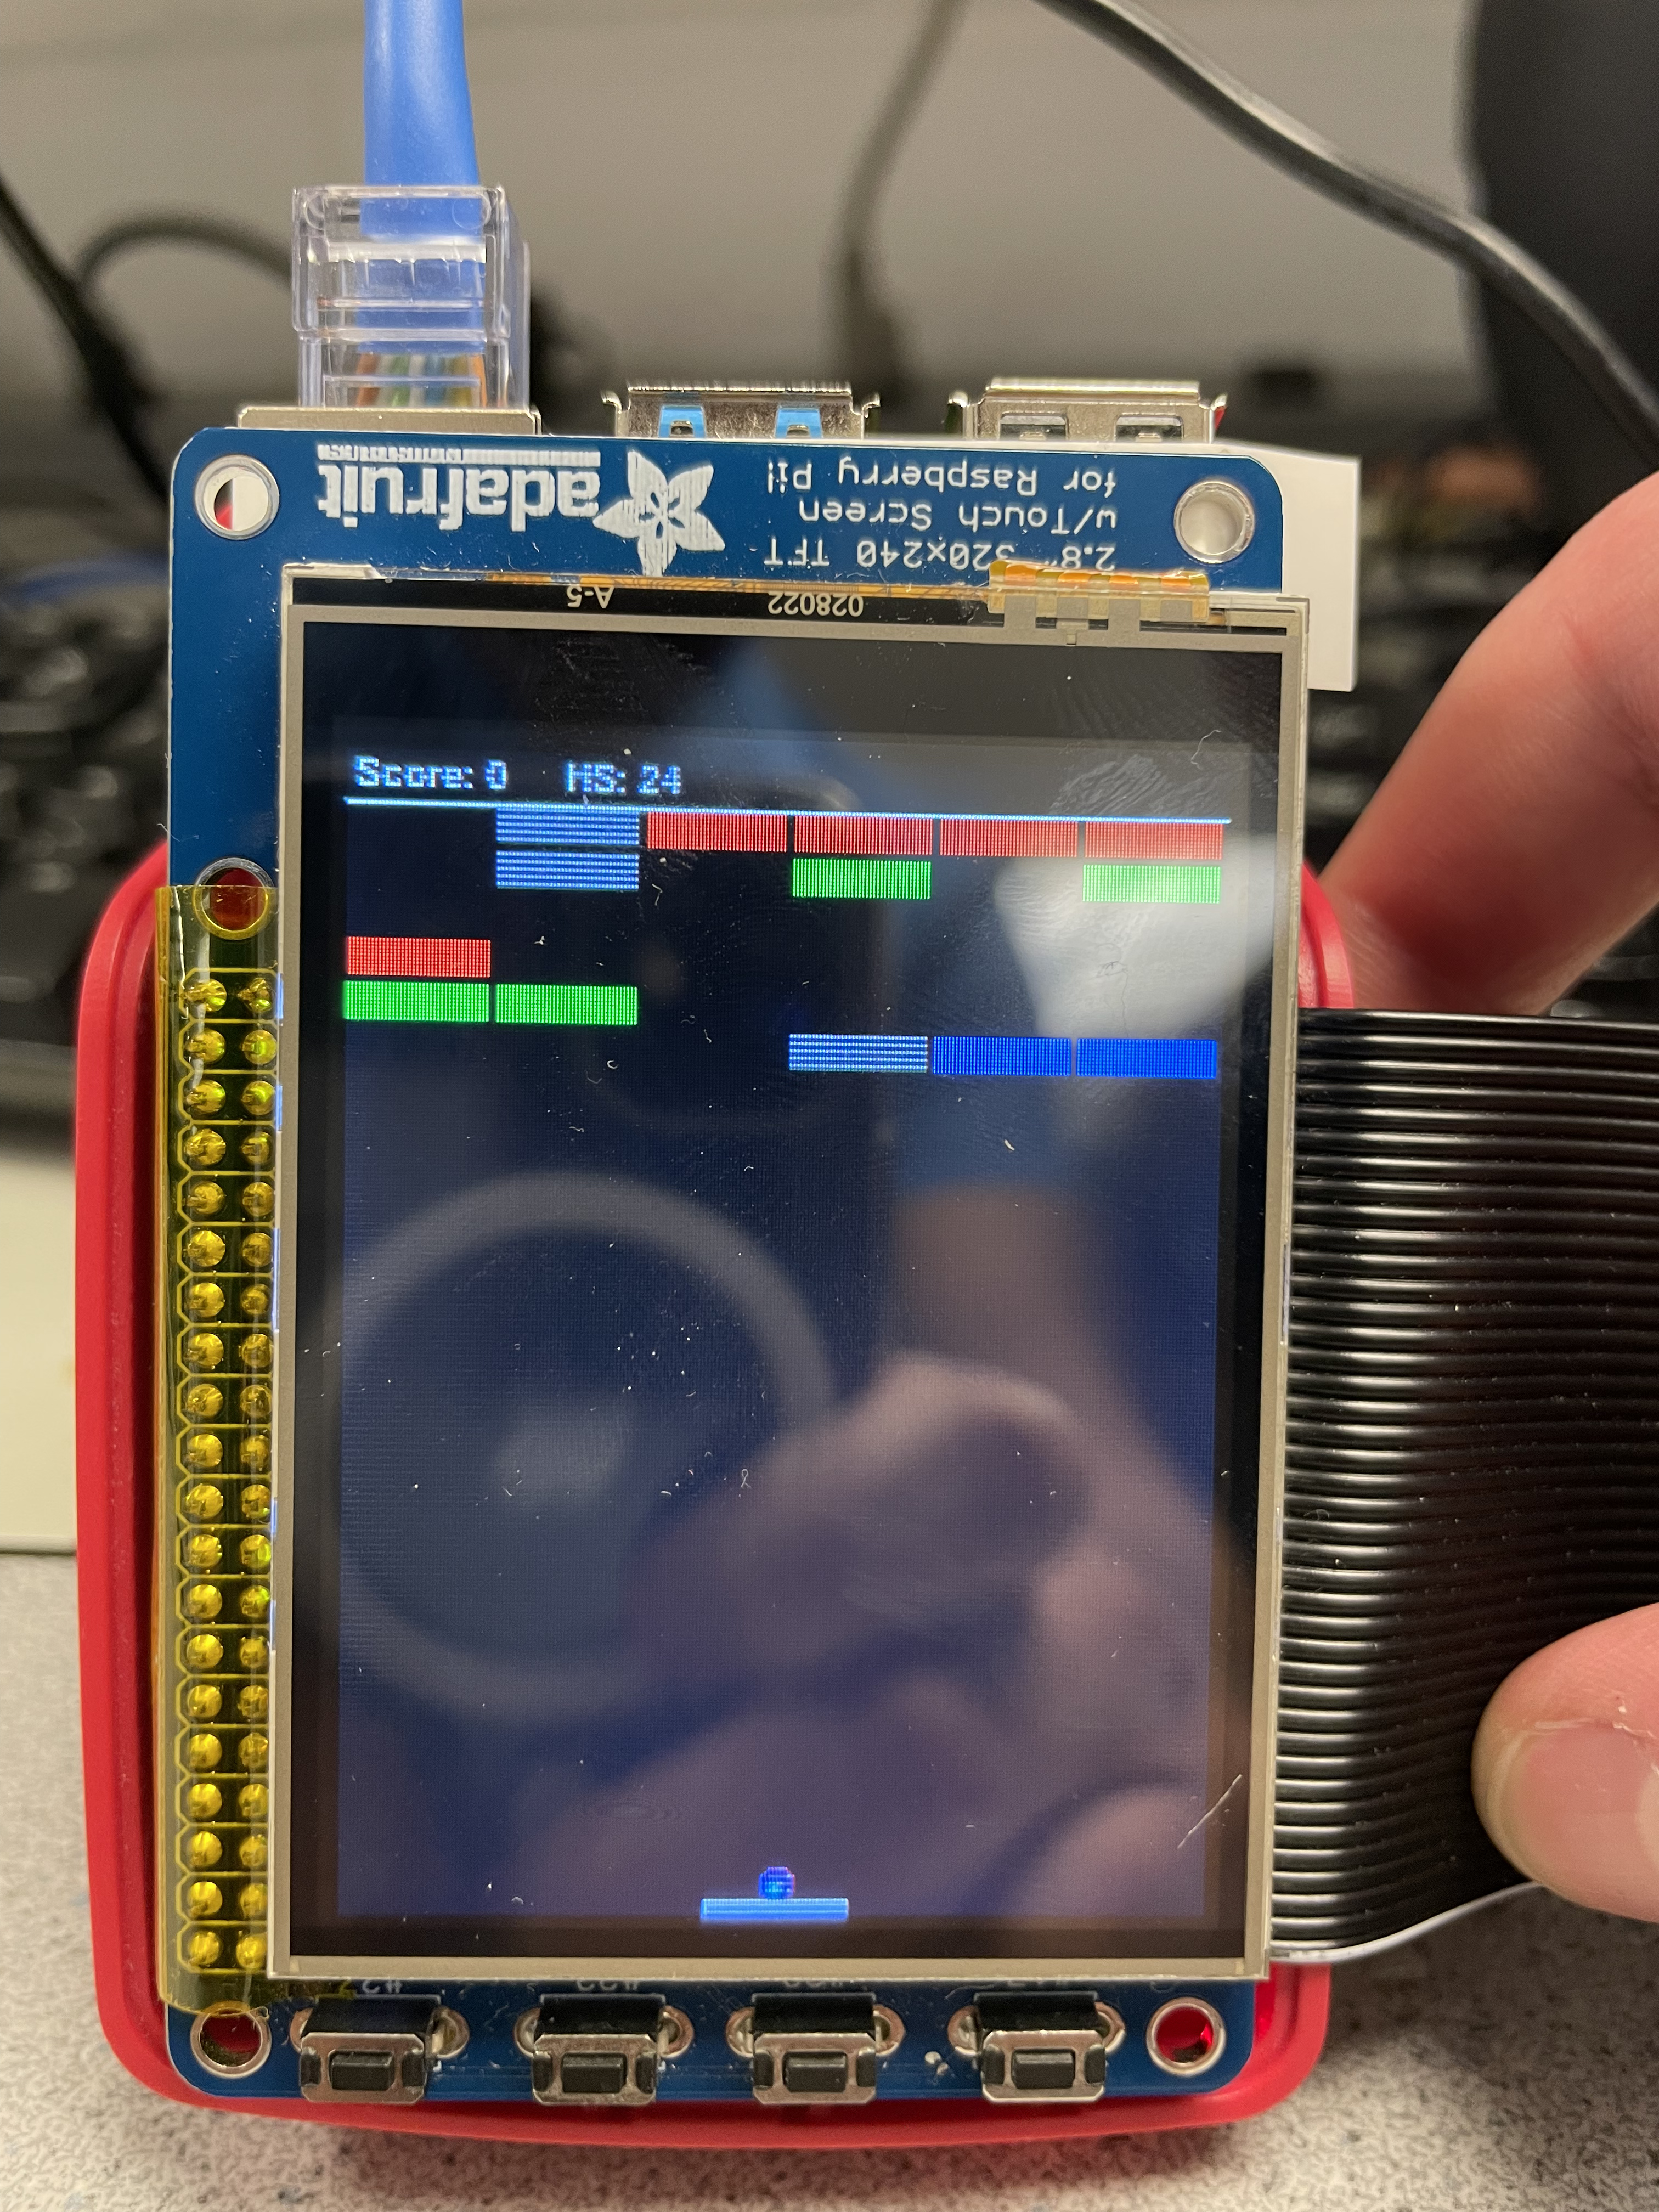
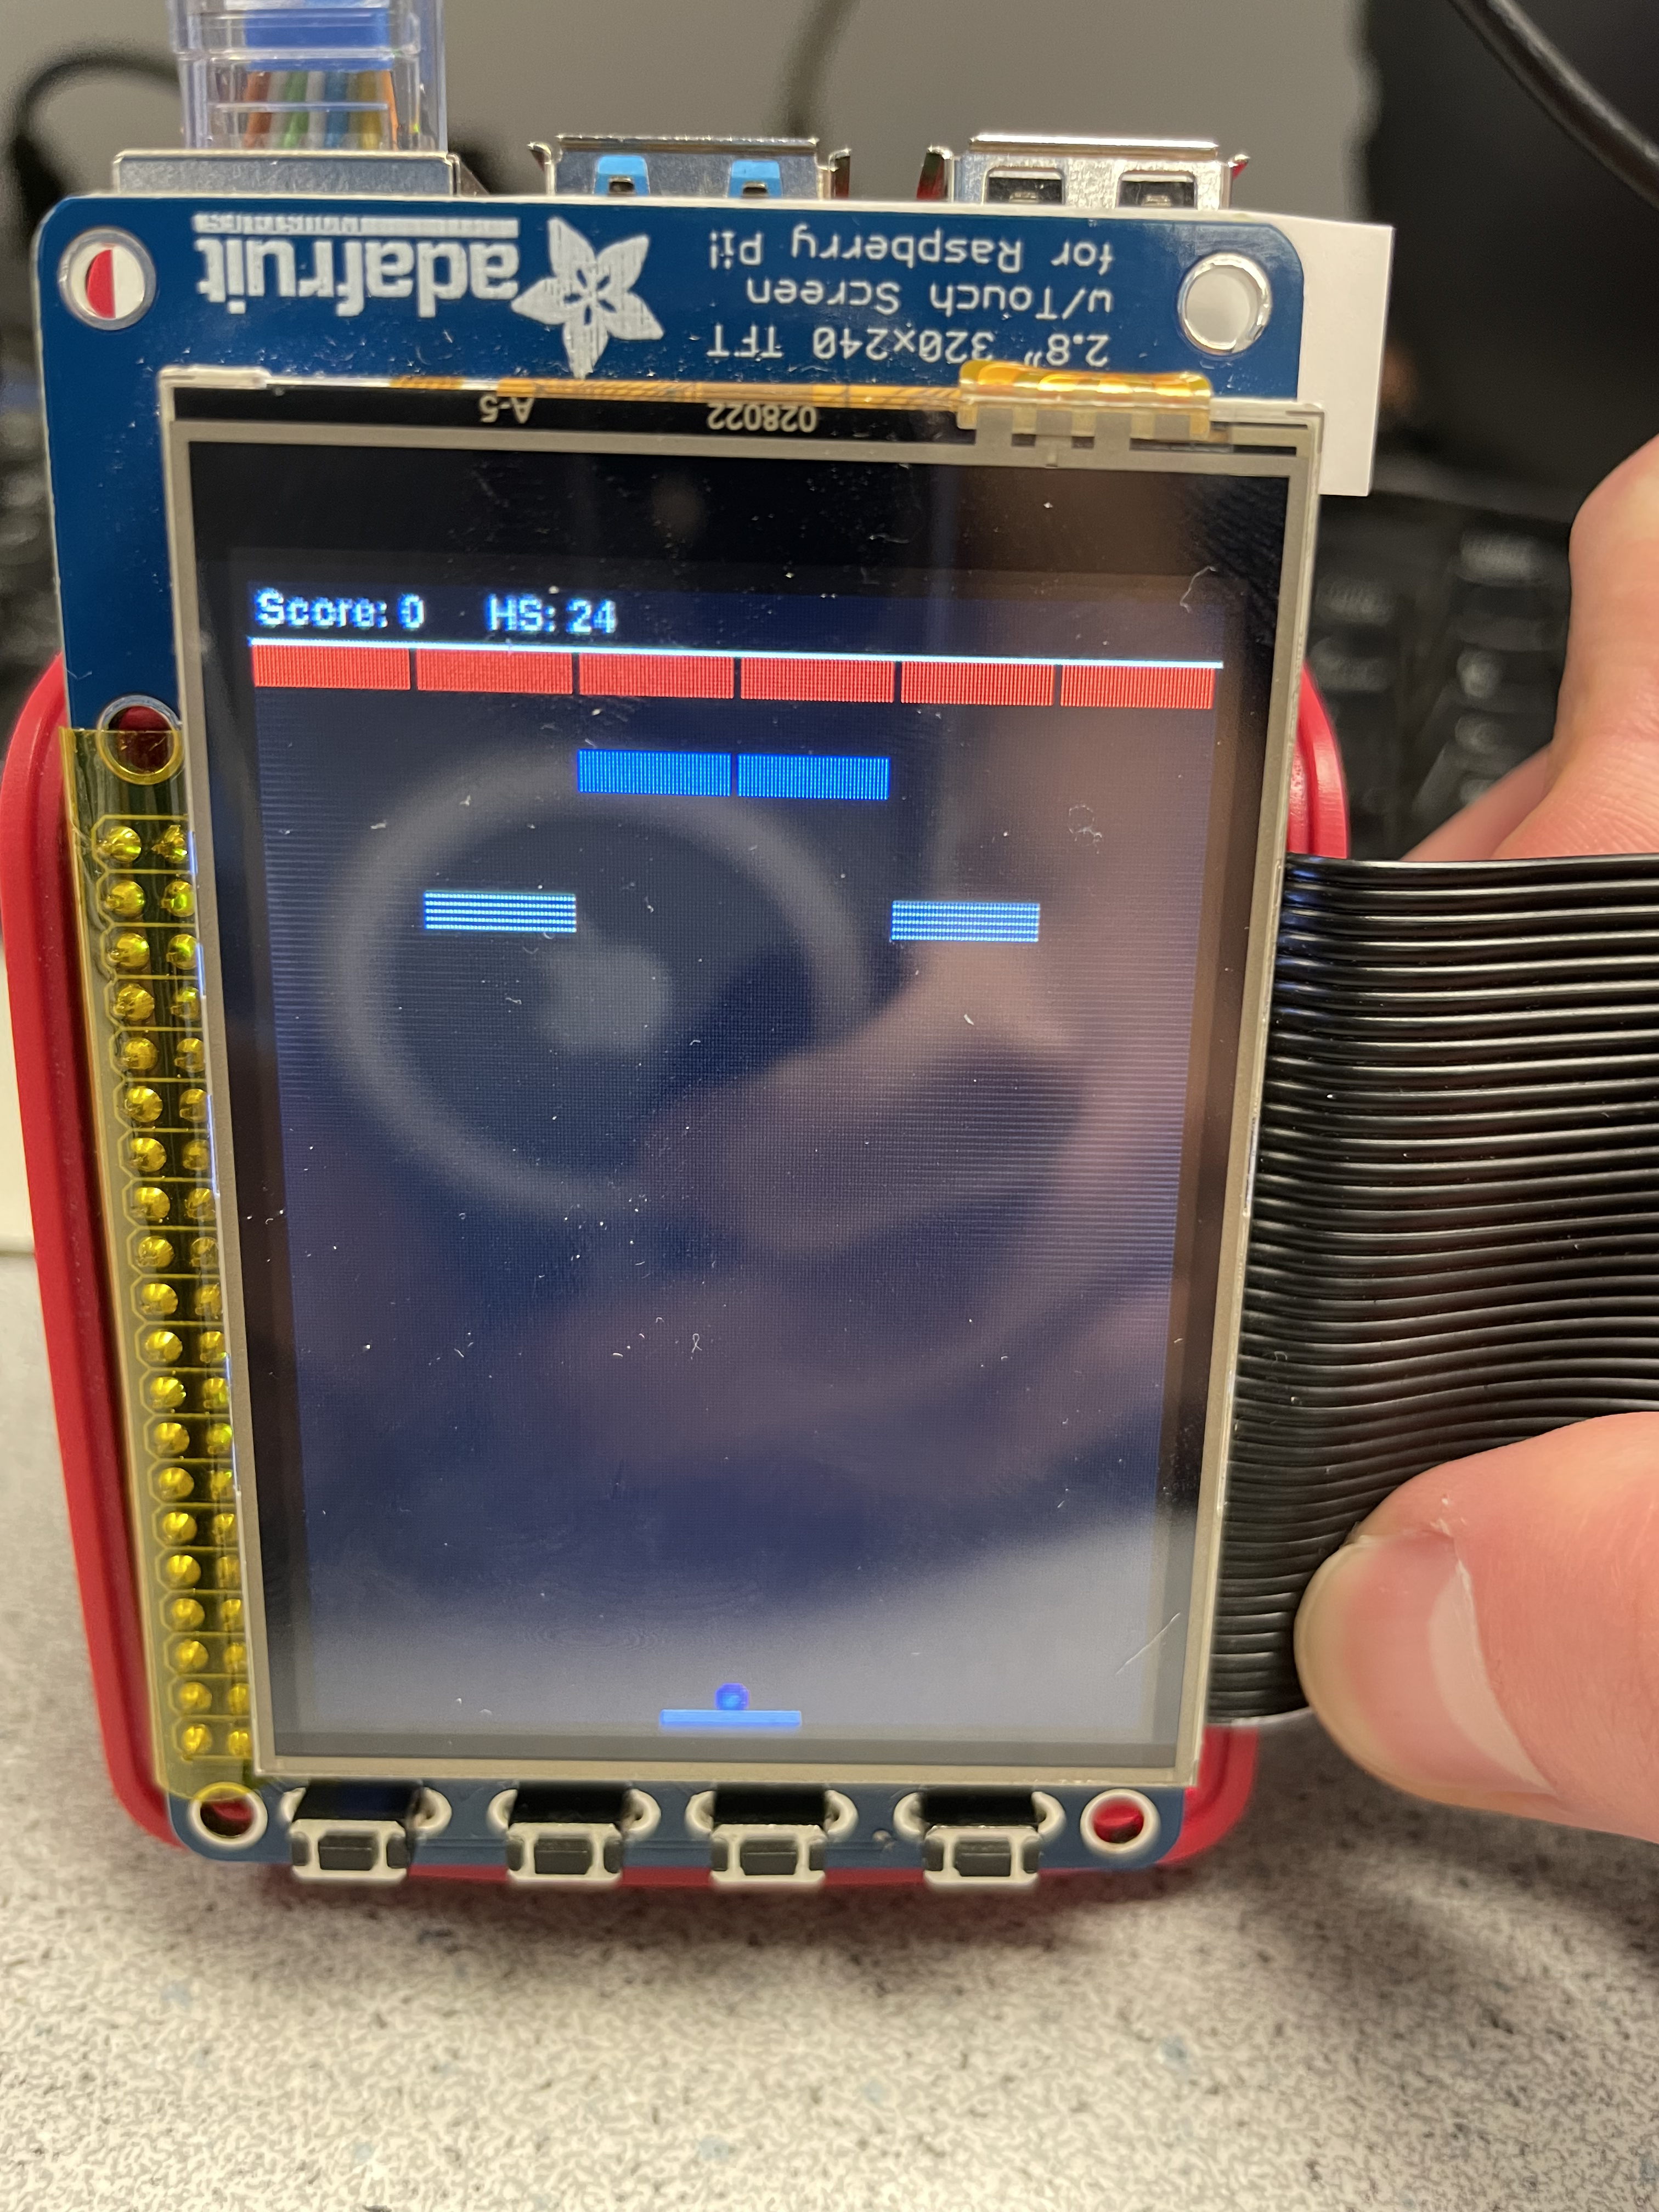
Figure 14-17: Levels 5-8
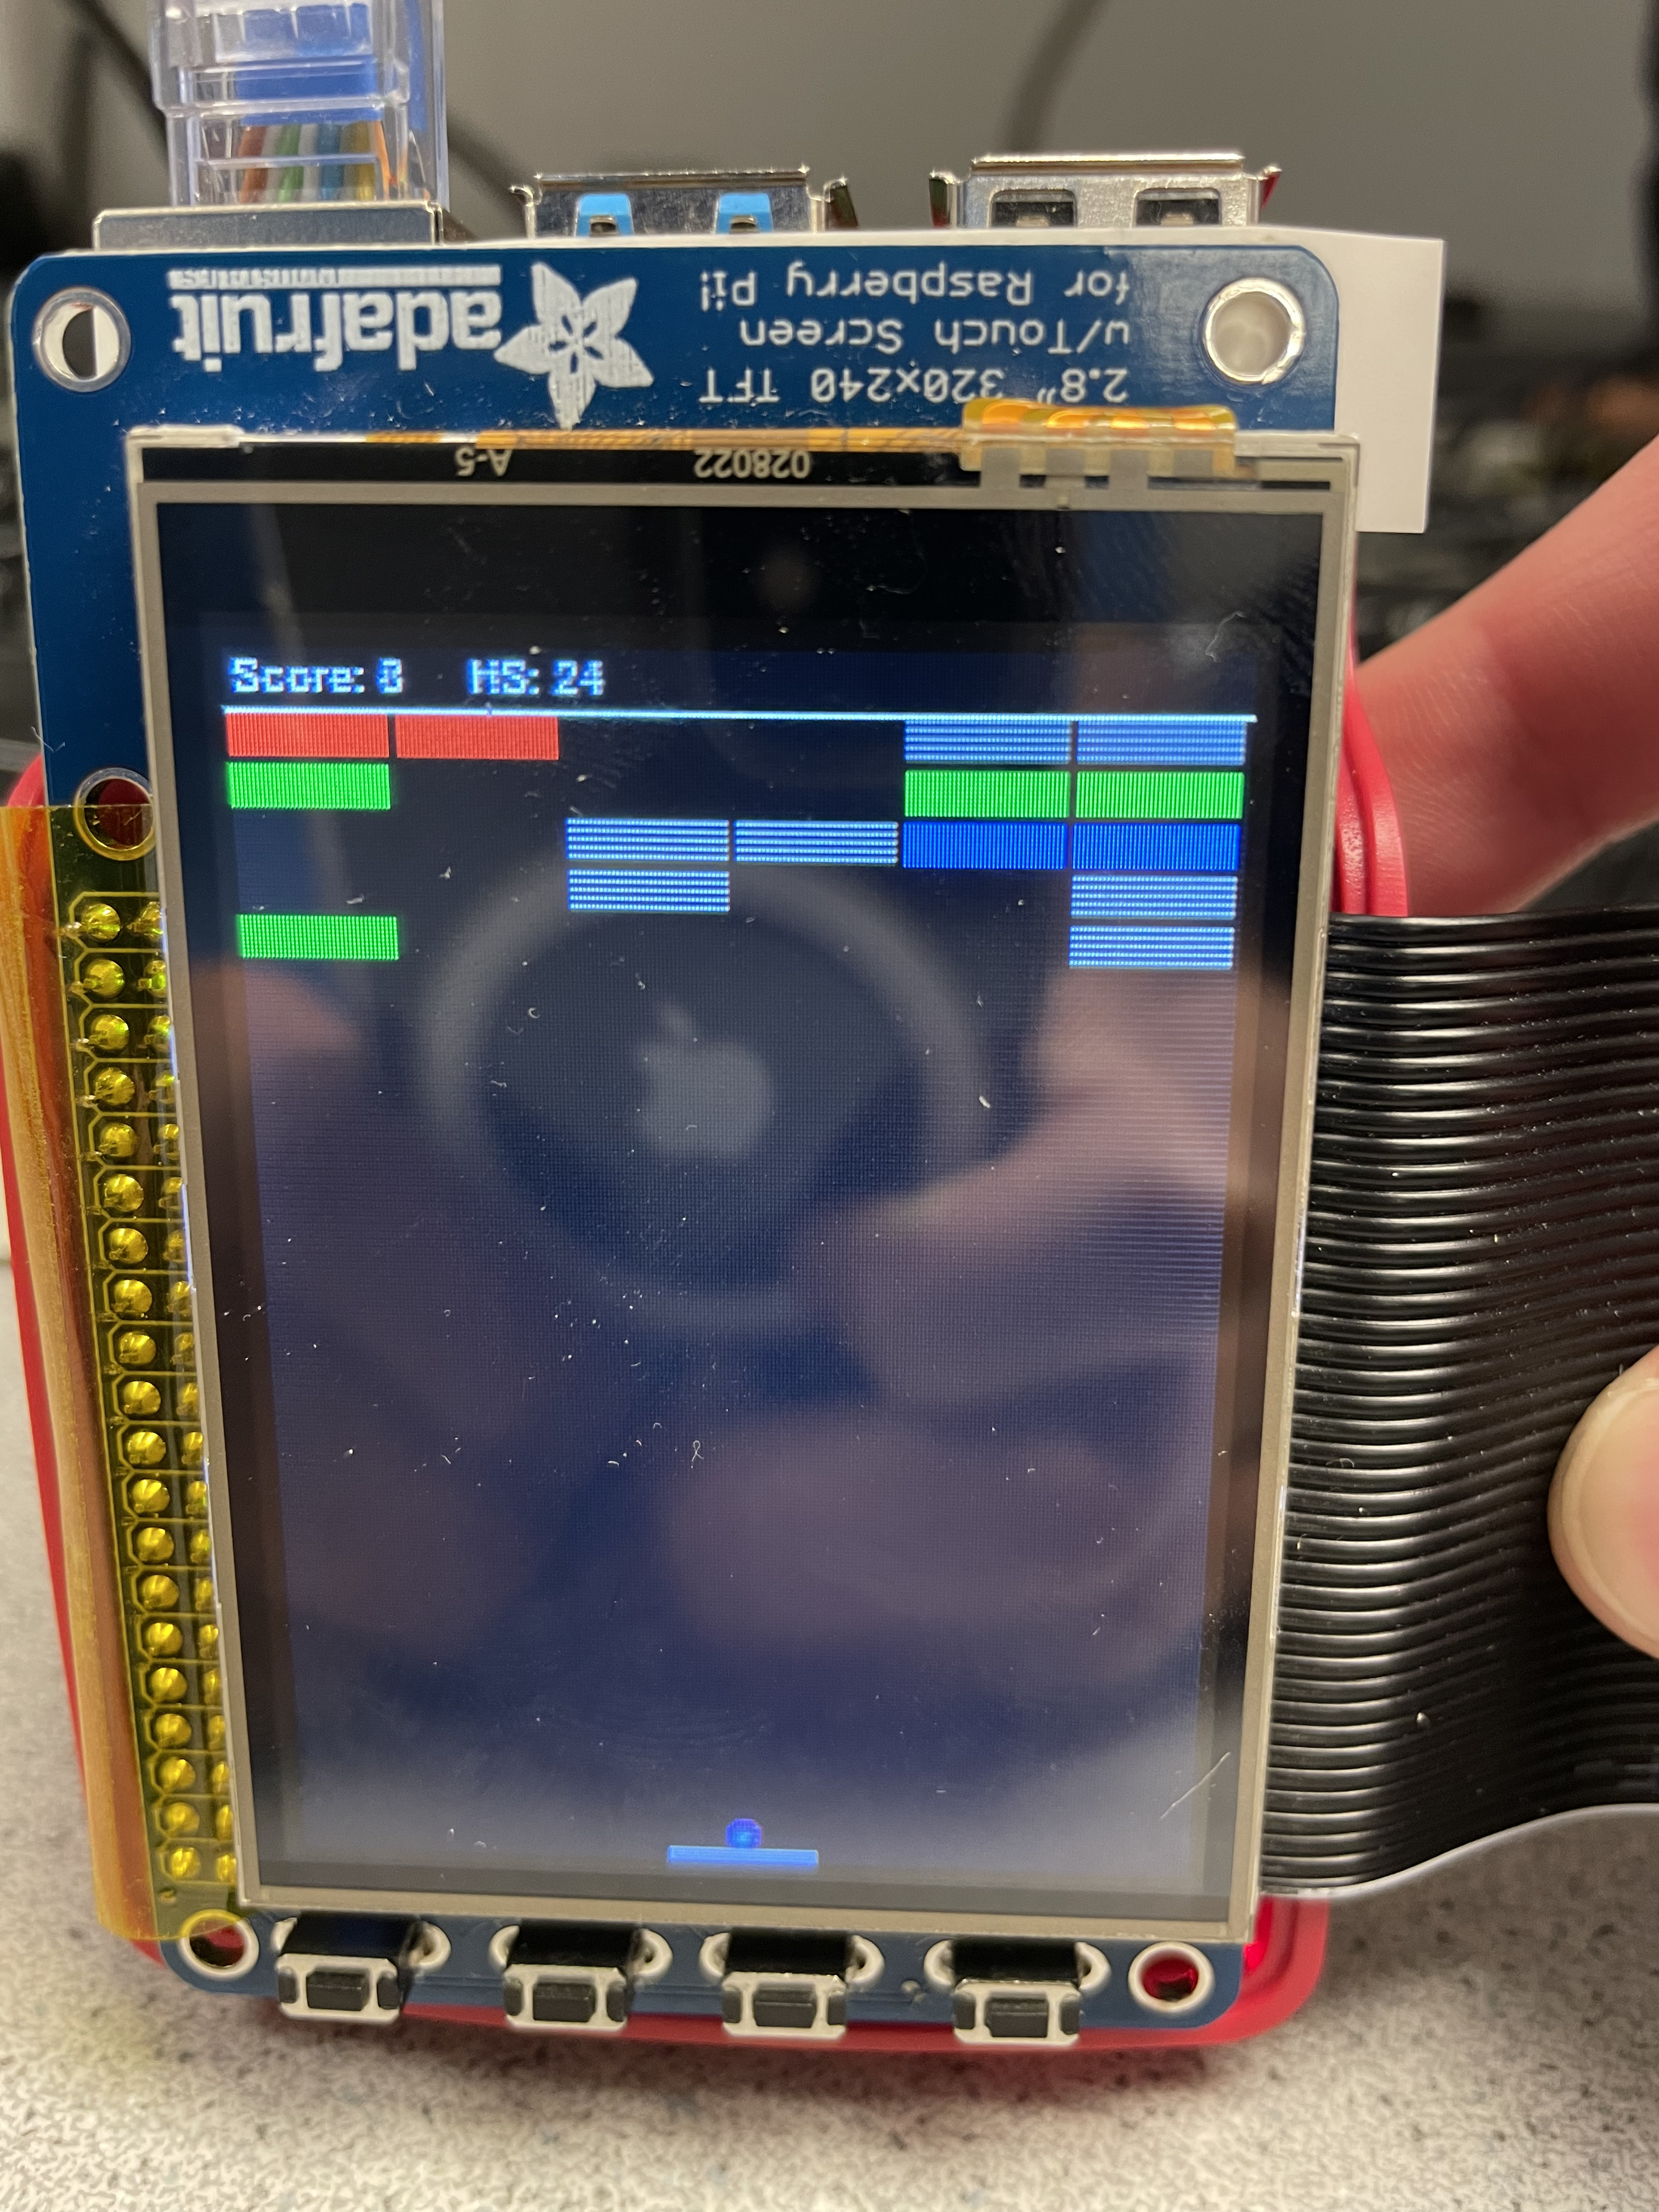
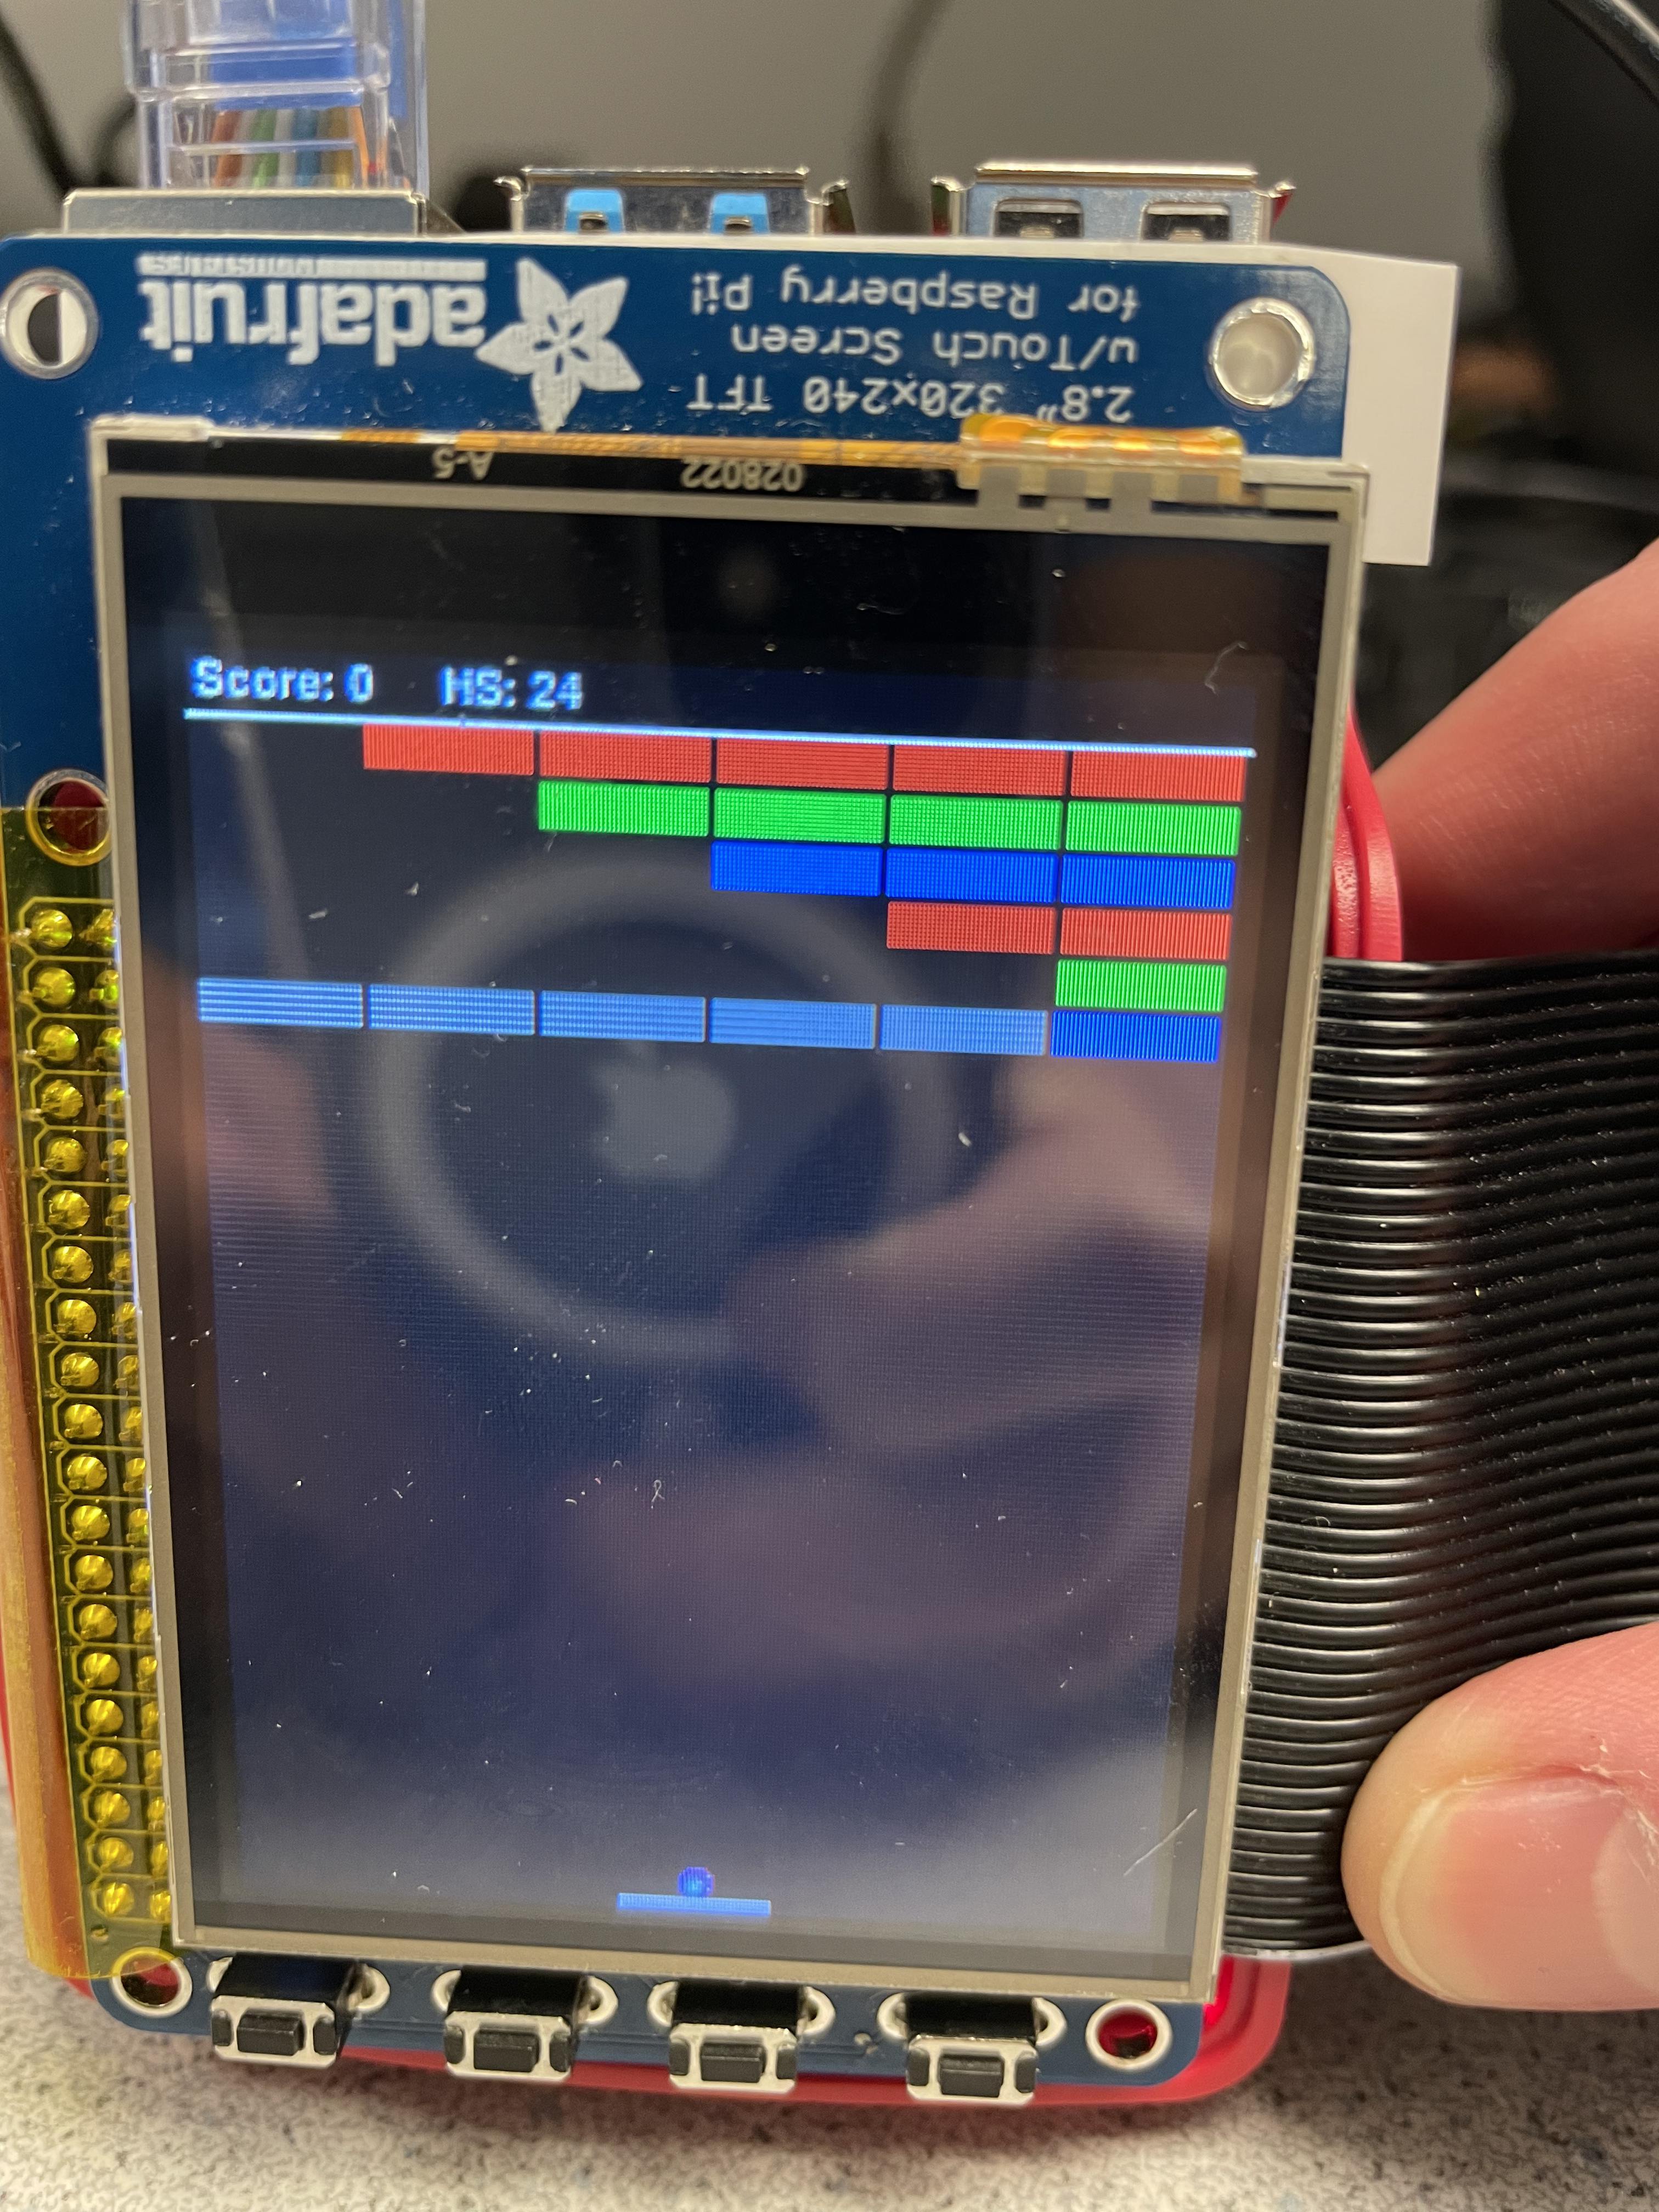
Figure 18-19: Levels 9-10
Previously, if the player missed a ball or finished Level 10, the game would exit. However, now we wanted to direct the player back to the starting screen once they finished a playthrough. Thus, we added winning and losing screens (Figure 20). Selecting “Play Again” would send the player back to the starting screen where they could decide to start from the beginning or choose a specific level. This allows the user to continue playing the game as long as they choose; once the game is started initially, it will never quit unless “Quit” is explicitly selected. We needed to add a sleep period after the button was pressed; otherwise, we would immediately cycle through the start screen and start at the first level.
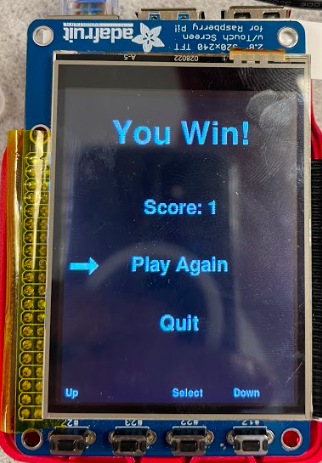
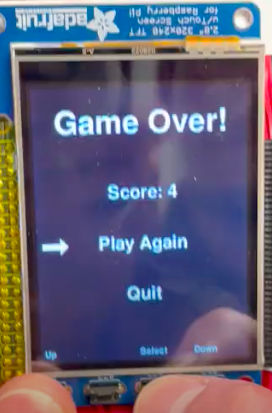
Figure 20: Winning and Losing Screens
One addition we made was to wait at the start of each level before the ball starts moving. This gives the player time to look at the level and plan out where they want to launch the ball from. We accomplished this by attaching both the ball and paddle Rects to the TFT buttons until the start button is pressed. The ball is effectively stuck to the paddle until the button is pressed to launch it. The player can then move the paddle anywhere on the screen before starting, which lets them choose where the ball is sent at the start. This gave the player a lot more freedom over each level, since previously the ball would always get sent out at an angle from the center of the screen.
The final major component we added to the project was powerups. Powerups make the game significantly more fun, as the player must balance keeping the ball alive and getting helpful powerups that can help complete the level. In general, we attached powerups to certain blocks within levels. By leveraging our blocks list, this was simple and clean to do. If we wanted a certain brick to hold a powerup, we just specified a number after the “B” that denoted a specific powerup (Figure 21).
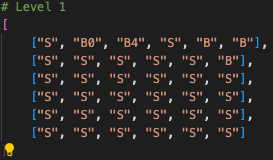
Figure 21: Blocks list with certain bricks holding powerups
When that brick is broken by the player, a visual of the powerup is created on the screen. Each iteration of the gameplay loop, the visual travels a certain number of pixels down the screen starting from the center of where its parent block resided (Figure 22).
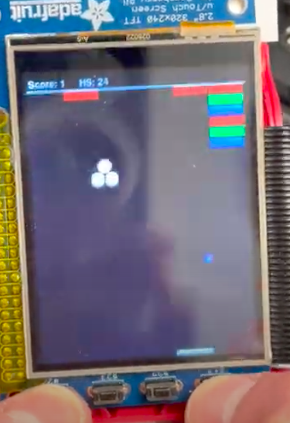
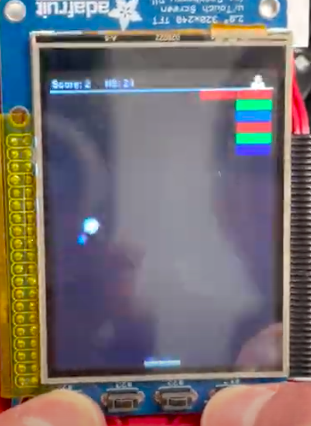
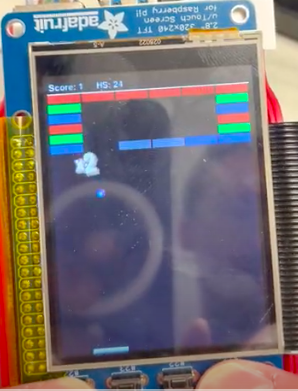
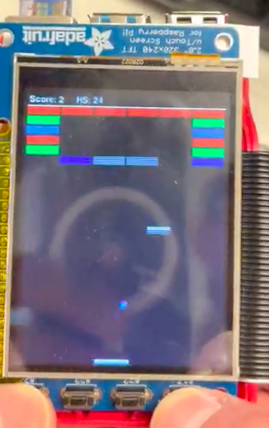
Figure 22: Powerups falling from their parent blocks
In order to actually obtain the powerup, the player must “catch” the powerup with the paddle. We handle this by checking for a collision between the paddle and the falling powerup. We keep track of active powerups in a list within the gameplay loop to apply the necessary effects to the ball or paddle. The caught powerups will appear in the top right corner of the screen so the player can see which powerups are active.
We implemented four helpful powerups and one detrimental powerup. The first powerup we created is called Freeze. This powerup cuts the ball speed in half, which gives the player more time to react and to position the paddle better. One design decision we wrestled with was how long the Freeze effect should last and how it should end. We realized that if we used a timer, the powerup could run out in the middle of its flight and immediately double its speed. This could confuse the player and lead to unfortunate losses. Thus, we decided to tie the powerup length to the number of ball-paddle collisions since gaining the powerup. This was simple to track, as we just needed to add a counter to the ball-paddle collision logic for each powerup. This works around the aforementioned problem, because the ball will always be traveling up towards the bricks when the powerup runs out. Therefore, there will be ample time to react to the speedup. After experimentation, we decided to give the powerup a “length” of eight paddle hits. Thus, Freeze runs out after the player returns the ball eight times.
The next powerup we implemented is called Multiplier. This acts as a 2x score multiplier and is also tied to eight paddle hits. After that, we created a powerup called LargePaddle. Grabbing this powerup increases the paddle length from 40 pixels to 55 pixels and lasts for eight paddle hits. This makes it significantly easier to return the ball, as well as to return multiple balls at a time. Returning multiple balls is extremely useful for the next powerup: ScatterShot. When the ScatterShot is grabbed, two extra balls are launched from the bottom corners of the screen (Figure 23). These balls are interchangeable with the initial ball; thus, they can break bricks. The player will not lose unless there are no balls left, so any two of the three balls can be missed without causing a loss. The extra balls significantly speed up level completion, even if they are missed after a few hits. Since there are more balls, however, eight paddle hits can accumulate quickly, ending other active powerups. Implementing this powerup required replacing the ball instance with a list of ball instances. Then, anywhere where we performed an action on the ball, we replaced it with a loop iterating through each of the ball instances.
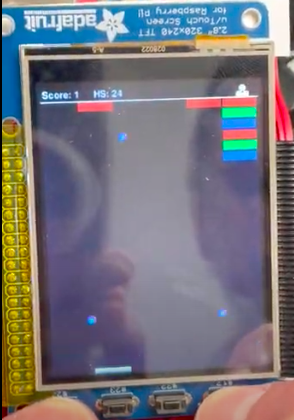
Figure 23: ScatterShot powerup active
The final powerup actually has a deadly effect. We call it the Spike (Figure 24), and touching it immediately results in a loss. This requires finesse to navigate, as sometimes the ball ends up near the falling spike. In this case, the paddle must be positioned perfectly to return the ball without getting hit by the spike.

Figure 24: Spike powerup
We played the game extensively to test that the powerups behaved properly. Initially, we had a problem where grabbing Freeze, then Scattershot would not slow down the two extra created balls. We realized that we needed to store the halved speed from the Freeze effect and start the extra balls at that speed. Other than that, we found no bugs with our implementation of powerups. We continued to play the game in order to test the system as a whole. For a project like this, we knew that certain bugs may only be found if a number of factors came together to expose a logic error. However, after playing through the game multiple times, we were confident that the code was correct and were satisfied with our work.
Results
After much play-testing, our final product performed as we intended. At the start of the project, we outlined a few key goals for ourselves. These included recreating the base game of Brick Breaker, scorekeeping, adding multiple levels, adding multiple powerups and adding a multiplayer mode. We were able to accomplish each of these goals except for adding a multiplayer mode. While working on the project, we decided not to include a multiplayer mode because we were having difficulty coming up with a mode that wouldn’t be too easy. We initially planned for this mode to have two paddles on the screen, with each player controlling one of the paddles. However, this would end up making the paddles take up a significant portion of the width of the screen, making the game much easier without much risk of losing. As such, we decided to forego the multiplayer mode and instead focused on polishing the features we had implemented. When developing with an embedded system, there are always bound to be changes made to a design, and ours was no exception.
Conclusion
Overall, we were successfully able to create Brick Breaker on the Raspberry Pi. The game is able to be played using the buttons included on the TFT screen attached to the Raspberry Pi. This allowed for the final product to come in a small form factor, only taking up the footprint of the Raspberry Pi. Our game has realistic ball collision physics that allow for the user to gain intuitive control over the ball. To make the game more engaging, we added 10 levels, wall blocks, multiple hits to break a block and many different powerups to change how the game is played. Developed with pygame, our code was designed with extensibility in mind, allowing for new features to be easily added and expanded upon. The flexible nature of Python and pygame meant that we were able to implement all the functionalities we needed for the game. However, there are some limitations regarding how the hardware and software interact. When we tried to increase the number of angles that the paddle would allow, we needed to increase how many pixels a ball moved each cycle. This resulted in unrealistic interactions between the blocks, ball and paddle. Thus we needed to limit the number of angles the paddle allowed for so that the physics remained realistic. Part of this limitation is due to the fact that all screens can only draw points at integer pixel coordinates, which limits the resolution of the angles the ball can travel at.
Future Work
Due to the extensible nature of our project, there definitely many different additions that could have been explored, given more time. First, more powerups could be added to allow for even more varied gameplay. For instance, some other powerups we could have added include an insta-break powerup, a projectile shooter powerup, and an extra life powerup. Another major feature that we were considering was the addition of a multiplayer mode, which would allow for two players to work together to complete levels. While we decided to not include this mode in our final design, given more time, a multiplayer mode could be made that would allow for two people to play brick breaker while being challenging at the same time.
Work Distribution
Both Dilan and Stephen worked together on all of the software design, bouncing ideas off each other and coding together using VSCode Live Share. For the report, Dilan wrote the Intro and the Design and Tesing sections, and Stephen wrote the Objectives, Results, Conclusion and Future Work sections.
Budget
- Raspberry Pi: N/A
- PiTFT: N/A
Total: $0
Code Appendix
// brickbreaker.py
"""
Dilan Lakhani (djl357)
Stephen Zakoworotny (sjz38)
Final Project
10/25/22
"""
import pygame
from pygame.locals import * # for event MOUSE variables
import os
import time
import random
from utils import *
from constants import *
import params
from levels import *
from Blocks import *
if on_raspi:
import RPi.GPIO as GPIO
GPIO.setmode(GPIO.BCM) # Set for GPIO (bcm) numbering not pin numbers...
GPIO.setup(17, GPIO.IN, pull_up_down=GPIO.PUD_UP) # right
GPIO.setup(27, GPIO.IN, pull_up_down=GPIO.PUD_UP) # left
GPIO.setup(22, GPIO.IN, pull_up_down=GPIO.PUD_UP) # quit
os.putenv('SDL_VIDEODRIVER', 'fbcon') # Display on piTFT
os.putenv('SDL_FBDEV', '/dev/fb0')
os.putenv('SDL_MOUSEDRV', 'TSLIB') # Track mouse clicks on piTFT
os.putenv('SDL_MOUSEDEV', '/dev/input/touchscreen')
else:
import keyboard
pygame.init()
pygame.mouse.set_visible(False)
screen = pygame.display.set_mode((240, 320))
screen.fill(BLACK) # Erase the Work space
screen = pygame.display.set_mode(size)
# Creates highscore text file if it doesn't exist yet
highscore = create_highscore_file()
while True:
# Initialize score
score = 0
# Create starting screen
cur_level = init_start_screen(screen)
# Loop through each level
while cur_level < len(levels):
# ======= This is the level initialization section =======
# Init ball list and add first ball
ball_list = [] # will hold list of lists of ball and ball_rect for each ball
speed_list = [] # holds ball_speed for each ball
ball_list.append(init_ball())
# Init paddle
paddle, paddle_rect = init_paddle(paddle_length, 120)
# Initialize all bricks in this level
blocks, num_bricks = init_bricks(cur_level)
# ==================================================
# ======= This is the level start before launching ball =======
while True:
screen.fill(BLACK)
# Draw text above top bricks
draw_top_text(screen, score, highscore)
# Draw bricks
for i in range(len(blocks)):
block = blocks[i]
# draw block with color and Rect
pygame.draw.rect(screen, block.color, block.rect)
ball1_speed = [speed_factor, -speed_factor]
# Start button
if on_raspi:
if not GPIO.input(22):
speed_list.append(ball1_speed)
break
else:
if keyboard.is_pressed('enter'):
speed_list.append(ball1_speed)
break
paddle_rect, ball_list[0][1] = control_paddle_and_ball(paddle_rect, ball_list[0][1])
# Combine Ball and Paddle surface with workspace surface
screen.blit(ball_list[0][0], ball_list[0][1])
screen.blit(paddle, paddle_rect)
pygame.display.flip()
time.sleep(0.015)
# ==================================================
# ======= This is the gameplay loop =======
falling_powerups = []
active_powerups = {}
while num_bricks > 0:
lost = False
start_time = time.time()
# Need to clear screen to get rid of old ball
screen.fill(BLACK)
# Draw score and highscore above blocks
draw_top_text(screen, score, highscore, active_powerups)
# Draw all bricks and do brick collision logic
i = 0
while i height:
del falling_powerups[i]
else:
i += 1
# Paddle-ball collision logic
for i in range(len(ball_list)):
if ball_list[i][1].colliderect(paddle_rect):
bounce_ball_off_paddle(paddle_rect, ball_list[i][1], speed_list[i])
# Loop through all active powerups and decrement if there is a paddle hit
for k in list(active_powerups.keys()):
v = active_powerups[k]
active_powerups[k] = v - 1
if v - 1 == 0:
# Revert powerup
if k == "Freeze":
for j in range(len(ball_list)):
speed_list[j][0] = int(speed_list[j][0] * freeze_factor)
speed_list[j][1] = int(speed_list[j][1] * freeze_factor)
elif k == "Multiplier":
params.score_multiplier = 1
elif k == "LargePaddle":
paddle, paddle_rect = init_paddle(paddle_length, paddle_rect.center[0])
# Remove powerup from list
del active_powerups[k]
# ball-wall collision logic
for i in range(len(ball_list)):
bounce_ball_off_wall(ball_list[i][1], speed_list[i])
# Missed ball, lose
j = 0
while j < len(ball_list):
if ball_list[j][1].bottom > height:
del ball_list[j]
del speed_list[j]
if len(ball_list) == 1:
del active_powerups["ScatterShot"] # this will remove the powerup from the top text
if len(ball_list) == 0:
# gameover
lost = True
else:
j += 1
# Move
for i in range(len(ball_list)):
ball_list[i][1] = ball_list[i][1].move(speed_list[i])
# Move paddle
paddle_rect = control_paddle(paddle_rect)
# Combine Ball and Paddle surface with workspace surface
for i in range(len(ball_list)):
screen.blit(ball_list[i][0], ball_list[i][1])
screen.blit(paddle, paddle_rect)
pygame.display.flip()
execution_time = time.time() - start_time
sleep_time = 0.015
# sleep_time = 0.03 # Used for Stephen's debugging on VM
if execution_time <= sleep_time:
time.sleep(sleep_time-execution_time) # to slow down animation (slow down ball)
# Check if we lost (need to break out of two while loops)
if lost:
break
if lost:
break
time.sleep(0.1)
# Move to next level
cur_level += 1
# ==================================================
# losing screen with Score, play again, and quit
# if press play again then break
# if press quit then exit()
win_lose_text = 'You Win!' if cur_level==10 else 'Game Over!'
losing_screen_button = {win_lose_text:[(120,40),50], 'Score: ':[(120,120),30], 'Play Again':[(120,180),30], 'Quit':[(120,240),30], \
'Up':[(10,310),15], 'Select':[(130,310),15], 'Down':[(190,310),15]}
arrow = pygame.image.load("arrow.png")
arrow = pygame.transform.scale(arrow, (30,20))
arrow_rect = arrow.get_rect(center=(20,180))
while True:
screen.fill(BLACK)
for my_text, text_pos in losing_screen_button.items():
# Draw PiBreaker, Start, Level Selector, and Quit
if my_text == "Score: ":
my_text += str(score)
my_font = pygame.font.Font(None, text_pos[1])
text_surface = my_font.render(my_text, True, WHITE)
rect = text_surface.get_rect(center=text_pos[0])
screen.blit(text_surface, rect)
# Move arrow based on GPIO press
if on_raspi:
if not GPIO.input(27):
if arrow_rect.center[1] > 180: # do not move arrow up if it is pointing to Play Again
arrow_rect = arrow_rect.move(0,-60) # move arrow up
elif not GPIO.input(17):
if arrow_rect.center[1] < 240: # do not move arrow down if it is pointing to Quit
arrow_rect = arrow_rect.move(0,60) # move arrow down
elif not GPIO.input(22): # Select key
if arrow_rect.center[1] == 180: # Select Play Again
time.sleep(0.5) # for GPIO debouncing
break # break out of this loop and start game loop again
elif arrow_rect.center[1] == 240: # Select Quit
exit()
else:
if keyboard.is_pressed('w'):
if arrow_rect.center[1] > 180: # do not move arrow up if it is pointing to Play Again
arrow_rect = arrow_rect.move(0,-60) # move arrow up
elif keyboard.is_pressed('s'):
if arrow_rect.center[1] < 240: # do not move arrow down if it is pointing to Quit
arrow_rect = arrow_rect.move(0,60) # move arrow down
elif keyboard.is_pressed('enter'): # Select key
if arrow_rect.center[1] == 180: # Select Play Again
time.sleep(0.5) # for GPIO debouncing
break # break out of this loop and start game loop
elif arrow_rect.center[1] == 240: # Select Quit
exit()
screen.blit(arrow, arrow_rect)
pygame.display.flip()
time.sleep(0.1) # for GPIO debouncing
pygame.quit()
// utils.py
"""
Dilan Lakhani (djl357)
Stephen Zakoworotny (sjz38)
Final Project
10/25/22
"""
from constants import *
import params
from levels import *
from Blocks import *
import pygame
import time
from pygame.locals import * # for event MOUSE variables
if on_raspi:
import RPi.GPIO as GPIO
else:
import keyboard
def init_ball(xpos=120):
ball = pygame.image.load("magic_ball.png")
ball = pygame.transform.scale(ball, (10,10))
ball_rect = ball.get_rect(center=(xpos,310))
return [ball, ball_rect]
def init_paddle(length, xpos):
paddle = pygame.image.load("paddle.png")
paddle = pygame.transform.scale(paddle, (length,10))
paddle_rect = paddle.get_rect(center=(xpos,320))
return paddle, paddle_rect
def init_bricks(num_level):
blocks = []
num_bricks = 0
for i in range(num_rows):
for j in range(int(width/brick_x_len)):
x = j * (brick_x_len + spacing)
y = i * (brick_y_len + spacing) + font_size # add offset for text on top
color = brick_colors[i%len(brick_colors)]
# Need to all color.copy() bc otherwise we are passing in pointer to color var
if levels[num_level][i][j][0] == "B":
powerup = None
if len(levels[num_level][i][j]) > 1:
powerup_idx = int(levels[num_level][i][j][1:])
powerup = powerup_mapping[powerup_idx]
blocks.append(Brick(x, y, hits_to_break, powerup, color.copy()))
num_bricks += 1
elif levels[num_level][i][j] == "W":
blocks.append(Wall(x, y))
return blocks, num_bricks
def init_start_screen(screen):
starting_level = 0
# Make start screen
level_1_buttons = {'PiBreaker':[(120,40),50], 'Start':[(120,120),30], 'Level Selector':[(120,180),30], 'Quit':[(120,240),30], \
'Up':[(10,310),15], 'Select':[(130,310),15], 'Down':[(190,310),15]}
level_2_buttons = {'Level 1':[(120,15),25],
'Level 2':[(120,45),25],
'Level 3':[(120,75),25],
'Level 4':[(120,105),25],
'Level 5':[(120,135),25],
'Level 6':[(120,165),25],
'Level 7':[(120,195),25],
'Level 8':[(120,225),25],
'Level 9':[(120,255),25],
'Level 10':[(120,285),25],
'Up':[(10,310),15],
'Select':[(130,310),15],
'Down':[(190,310),15]}
arrow = pygame.image.load("arrow.png")
arrow = pygame.transform.scale(arrow, (30,20))
arrow_rect = arrow.get_rect(center=(20,120))
go_to_level2 = False
# First Layer
while True:
screen.fill(BLACK)
for my_text, text_pos in level_1_buttons.items():
# Draw PiBreaker, Start, Level Selector, and Quit
my_font = pygame.font.Font(None, text_pos[1])
text_surface = my_font.render(my_text, True, WHITE)
rect = text_surface.get_rect(center=text_pos[0])
screen.blit(text_surface, rect)
# Move arrow based on GPIO press
if on_raspi:
if not GPIO.input(27):
if arrow_rect.center[1] > 120: # do not move arrow up if it is pointing to Start
arrow_rect = arrow_rect.move(0,-60) # move arrow up
elif not GPIO.input(17):
if arrow_rect.center[1] < 240: # do not move arrow down if it is pointing to Quit
arrow_rect = arrow_rect.move(0,60) # move arrow down
elif not GPIO.input(22): # Select key
if arrow_rect.center[1] == 120: # Select Start
break # break out of this loop and start game loop
elif arrow_rect.center[1] == 180: # Level Selector
go_to_level2 = True
arrow_rect = arrow_rect.move(50,-165) # move arrow up
break
elif arrow_rect.center[1] == 240: # Select Quit
exit()
else:
if keyboard.is_pressed('w'):
if arrow_rect.center[1] > 120: # do not move arrow up if it is pointing to Start
arrow_rect = arrow_rect.move(0,-60) # move arrow up
elif keyboard.is_pressed('s'):
if arrow_rect.center[1] < 240: # do not move arrow down if it is pointing to Quit
arrow_rect = arrow_rect.move(0,60) # move arrow down
elif keyboard.is_pressed('enter'): # Select key
if arrow_rect.center[1] == 120: # Select Start
break # break out of this loop and start game loop
elif arrow_rect.center[1] == 180: # Level Selector
go_to_level2 = True
arrow_rect = arrow.get_rect(center=(65,15))
break
# arrow_rect = arrow_rect.move(0,-165) # move arrow up
elif arrow_rect.center[1] == 240: # Select Quit
exit()
screen.blit(arrow, arrow_rect)
pygame.display.flip()
time.sleep(0.1) # for GPIO debouncing
# for GPIO debouncing
time.sleep(0.1)
# Second Layer
while go_to_level2:
screen.fill(BLACK)
for my_text, text_pos in level_2_buttons.items():
# Draw PiBreaker, Start, Level Selector, and Quit
my_font = pygame.font.Font(None, text_pos[1])
text_surface = my_font.render(my_text, True, WHITE)
rect = text_surface.get_rect(center=text_pos[0])
screen.blit(text_surface, rect)
# Move arrow based on GPIO press
if on_raspi:
if not GPIO.input(27):
if arrow_rect.center[1] > 15: # do not move arrow up if it is pointing to Level 1
arrow_rect = arrow_rect.move(0,-30) # move arrow up
elif not GPIO.input(17):
if arrow_rect.center[1] < 285: # do not move arrow down if it is pointing to Level 10
arrow_rect = arrow_rect.move(0,30) # move arrow down
elif not GPIO.input(22): # Select key
starting_level = int((arrow_rect.center[1] - 15) / 30)
break
else:
if keyboard.is_pressed('w'):
if arrow_rect.center[1] > 15: # do not move arrow up if it is pointing to Level 1
arrow_rect = arrow_rect.move(0,-30) # move arrow up
elif keyboard.is_pressed('s'):
if arrow_rect.center[1] < 285: # do not move arrow down if it is pointing to Level 10
arrow_rect = arrow_rect.move(0,30) # move arrow down
elif keyboard.is_pressed('enter'): # Select key
starting_level = int((arrow_rect.center[1] - 15) / 30)
break
screen.blit(arrow, arrow_rect)
pygame.display.flip()
time.sleep(0.1) # for GPIO debouncing
# for GPIO debouncing
time.sleep(0.1)
return starting_level
def create_highscore_file():
try:
highscore_file = open("highscore.txt", "r")
highscore = int(highscore_file.readlines()[0])
highscore_file.close()
except:
highscore_file = open("highscore.txt", "w+")
highscore = 0
highscore_file.close()
return highscore
def check_highscore(score, highscore):
# Overwrites the text file highscore.txt if score is greater than the current highscore
if score > highscore:
write = open("highscore.txt", "w")
highscore = score
write.write(str(highscore))
write.close()
return highscore
def draw_top_text(screen, score, highscore, active_powerups={}):
# Draw Score, High Score, and Powerup Status
my_font = pygame.font.Font(None, font_size)
score_text = f'Score: {score} HS: {highscore}'
text_surface = my_font.render(score_text, True, WHITE)
score_rect = text_surface.get_rect(left=2, top=2) # position the Score at top of screen
pygame.draw.line(screen, WHITE, (0,14), (240,14), 1)
screen.blit(text_surface, score_rect)
i = 0
for k in list(active_powerups.keys()):
if k == "Freeze":
powerup = pygame.image.load("freeze.png")
elif k == "Multiplier":
powerup = pygame.image.load("x2_multiplier.png")
elif k == "LargePaddle":
powerup = pygame.image.load("paddle_powerup.png")
elif k == "Spike":
powerup = pygame.image.load("spike.png")
elif k == "ScatterShot":
powerup = pygame.image.load("scattershot.png")
powerup = pygame.transform.scale(powerup, (15,15))
powerup_rect = powerup.get_rect(right=230-i*20, bottom=15)
screen.blit(powerup, powerup_rect)
i += 1
# =============================================================================
# Ball Related Functions
# =============================================================================
def bounce_ball_off_block(block, ball_rect, ball_speed):
# ball is hitting bottom of block, and is moving upwards
if ball_rect.center[1] >= block.rect.bottom and ball_speed[1] < 0:
ball_speed[1] = -ball_speed[1]
# ball is hitting top of block, and is moving downwards
elif ball_rect.center[1] <= block.rect.top and ball_speed[1] > 0:
ball_speed[1] = -ball_speed[1]
# ball is hitting side of block
else:
ball_speed[0] = -ball_speed[0]
def bounce_ball_off_paddle(paddle_rect, ball_rect, ball_speed):
# Check where ball hits on paddle, get x coords of both rects
ball_center = ball_rect.center[0]
paddle_center = paddle_rect.center[0]
# Angle factor tells us on a scale from 0 to 1 how much of an angle should the ball come off the paddle at
angle_factor = (ball_center - paddle_center)/(paddle_length/2)
# Need to multiply by speed factor to translate [0...1] to [0...speed_factor]
angle_factor = angle_factor*speed_factor
# Change x speed to angle factor, and reverse y speed to bounce off
ball_speed[0] = int(angle_factor)
ball_speed[1] = -ball_speed[1]
def bounce_ball_off_wall(ball_rect, ball_speed):
if ball_rect.left < 0 or ball_rect.right > width:
ball_speed[0] = -ball_speed[0]
if ball_rect.top < font_size:
ball_speed[1] = -ball_speed[1]
def modify_brick(blocks, i, score, highscore, num_bricks, increment_i, falling_powerups):
block = blocks[i]
hits_left = block.hits_to_break
hits_left -= 1
# Need to save the new hits_left value in the Brick object
blocks[i].hits_to_break = hits_left
if hits_left == 0:
# Need to check if block contains powerup
if blocks[i].powerup != None:
p = blocks[i].powerup
if p == "Freeze":
powerup = pygame.image.load("freeze.png")
elif p == "Multiplier":
powerup = pygame.image.load("x2_multiplier.png")
elif p == "LargePaddle":
powerup = pygame.image.load("paddle_powerup.png")
elif p == "Spike":
powerup = pygame.image.load("spike.png")
elif p == "ScatterShot":
powerup = pygame.image.load("scattershot.png")
powerup = pygame.transform.scale(powerup, (30,30))
powerup_rect = powerup.get_rect(center=(blocks[i].x, blocks[i].y))
falling_powerups.append([powerup, powerup_rect, blocks[i].powerup])
del blocks[i] # remove brick from all blocks
score += 1 * params.score_multiplier # add to score
num_bricks -= 1 # decrement number of bricks left in level
highscore = check_highscore(score, highscore)
increment_i = False # do not increment i if we delete a Brick
else:
# Need to darken the brick that was hit
temp_color = block.color
if temp_color[0] > 0: # red
blocks[i].color[0] -= color_decrease
if temp_color[1] > 0: # green
blocks[i].color[1] -= color_decrease
elif temp_color[2] > 0: # blue
blocks[i].color[2] -= color_decrease
return increment_i, score, highscore, num_bricks, falling_powerups
def control_paddle(paddle_rect):
# To test locally use keyboard module, on RasPi will map these to GPIO presses
if on_raspi:
if not GPIO.input(27):
if paddle_rect.left > 0:
paddle_rect = paddle_rect.move(-paddle_speed_x,0) # move paddle left
elif not GPIO.input(17):
if paddle_rect.right < width:
paddle_rect = paddle_rect.move(paddle_speed_x,0) # move paddle right
else:
if keyboard.is_pressed('a'):
if paddle_rect.left > 0:
paddle_rect = paddle_rect.move(-paddle_speed_x,0) # move paddle left
elif keyboard.is_pressed('d'):
if paddle_rect.right < width:
paddle_rect = paddle_rect.move(paddle_speed_x,0) # move paddle right
return paddle_rect
def control_paddle_and_ball(paddle_rect, ball_rect):
# To test locally use keyboard module, on RasPi will map these to GPIO presses
if on_raspi:
if not GPIO.input(27):
if paddle_rect.left > 0:
paddle_rect = paddle_rect.move(-paddle_speed_x,0) # move paddle left
ball_rect = ball_rect.move(-paddle_speed_x,0) # move ball left
elif not GPIO.input(17):
if paddle_rect.right < width:
paddle_rect = paddle_rect.move(paddle_speed_x,0) # move paddle right
ball_rect = ball_rect.move(paddle_speed_x,0) # move paddle right
else:
if keyboard.is_pressed('a'):
if paddle_rect.left > 0:
paddle_rect = paddle_rect.move(-paddle_speed_x,0) # move paddle left
ball_rect = ball_rect.move(-paddle_speed_x,0) # move paddle left
elif keyboard.is_pressed('d'):
if paddle_rect.right < width:
paddle_rect = paddle_rect.move(paddle_speed_x,0) # move paddle right
ball_rect = ball_rect.move(paddle_speed_x,0) # move paddle right
return paddle_rect, ball_rect
// constants.py
"""
Dilan Lakhani (djl357)
Stephen Zakoworotny (sjz38)
Final Project
10/25/22
"""
on_raspi = True
# Colors
WHITE = [255, 255, 255]
BLACK = [0, 0, 0]
RED = [255, 0, 0]
GREEN = [0, 255, 0]
BLUE = [0, 0, 255]
GRAY = [127, 127, 127]
brick_colors = [RED, GREEN, BLUE]
# Set up screen vars
size = 240, 320
width, height = 240, 320
font_size = 15
# Gameplay constants
timeout = 30
speed_factor = 4 # How fast paddle will move (and balls)
paddle_length = 40
brick_x_len = 38
brick_y_len = 10
num_rows = 6
spacing = 2 # space between successive bricks
hits_to_break = 2 # how many hits needed to break brick
color_decrease = int(255/hits_to_break) # how much to decrease color of brick after each hit
# Speeds
paddle_speed_x = speed_factor
ball_speed = [speed_factor,-speed_factor]
# Powerups
# Mapping of index to powerup name
powerup_mapping = ['Freeze', 'Multiplier', 'LargePaddle', "Spike", "ScatterShot"]
falling_powerup_speed = 2
powerup_length = 8
freeze_factor = 2
// params.py
score_multiplier = 1
// Blocks.py
"""
Dilan Lakhani (djl357)
Stephen Zakoworotny (sjz38)
Final Project
10/25/22
"""
from constants import *
import pygame
from pygame.locals import * # for event MOUSE variables
class Brick:
def __init__(self, x, y, hits_to_break, powerup, color):
self.x = x
self.y = y
self.hits_to_break = hits_to_break
self.color = color
self.rect = pygame.Rect((x,y,brick_x_len,brick_y_len))
self.powerup = powerup
class Wall:
def __init__(self, x, y, color=GRAY):
self.x = x
self.y = y
self.color = color
self.rect = pygame.Rect((x,y,brick_x_len,brick_y_len))
// levels.py
"""
Dilan Lakhani (djl357)
Stephen Zakoworotny (sjz38)
Final Project
10/25/22
"""
# B = brick
# B0 = Freeze block
# B1 = Multiplier block
# B2 = LargePaddle block
# B3 = Spike block
# B4 = ScatterShot block
# W = wall
# S = space
levels = [
# Level 1
[
["S", "B0", "B4", "S", "B", "B"],
["S", "S", "S", "S", "S", "B"],
["S", "S", "S", "S", "S", "S"],
["S", "S", "S", "S", "S", "S"],
["S", "S", "S", "S", "S", "S"],
["S", "S", "S", "S", "S", "S"]
],
# Level 2
[
["B", "B", "B", "B", "B", "B"],
["B", "S", "S", "S", "S", "B"],
["B", "S", "S", "S", "S", "B"],
["B", "S", "S", "S", "S", "B"],
["B", "S", "S", "S", "S", "B"],
["B", "B1", "W", "W", "B2", "B"]
],
# Level 3
[
["B", "B", "B", "B", "B", "B"],
["B", "B", "B", "B", "B", "B"],
["B", "B", "B3", "B", "B", "B"],
["S", "S", "S", "S", "S", "S"],
["S", "S", "S", "S", "S", "S"],
["S", "S", "S", "S", "S", "S"]
],
# Level 4
[
["B", "B", "B", "B", "B", "B"],
["B", "S", "S", "S", "S", "B"],
["B", "S", "W", "W", "S", "B"],
["B", "S", "W", "W", "S", "B"],
["B", "S", "S", "S", "S", "B"],
["B", "B", "B", "B", "B", "B"]
],
# Level 5
[
["B", "B", "B", "S", "B", "B"],
["S", "B", "W", "S", "S", "B"],
["S", "S", "W", "S", "S", "B"],
["S", "W", "W", "S", "W", "S"],
["S", "B", "B", "W", "W", "S"],
["B", "B", "S", "W", "S", "S"]
],
# Level 6
[
["B3", "B", "B", "B", "B", "B"],
["S", "B", "S", "S", "B", "S"],
["S", "S", "B4", "B0", "S", "S"],
["S", "S", "S", "S", "S", "S"],
["S", "S", "S", "S", "S", "S"],
["S", "S", "S", "S", "S", "S"]
],
# Level 7
[
["S", "W", "B", "B", "B", "B"],
["S", "W", "S", "B2", "S", "B"],
["S", "S", "S", "S", "S", "S"],
["B0", "S", "S", "S", "S", "S"],
["B", "B", "S", "S", "S", "S"],
["S", "S", "S", "W", "B1", "B"]
],
# Level 8
[
["B", "B0", "B", "B", "B", "B"],
["S", "S", "S", "S", "S", "S"],
["S", "S", "B", "B4", "S", "S"],
["S", "S", "S", "S", "S", "S"],
["S", "S", "S", "S", "S", "S"],
["S", "W", "S", "S", "W", "S"]
],
# Level 9
[
["B0", "B", "S", "S", "W", "W"],
["B4", "S", "S", "S", "B", "B"],
["S", "S", "W", "W", "B", "B3"],
["S", "S", "W", "S", "S", "W"],
["B", "S", "S", "S", "S", "W"],
["S", "S", "S", "S", "S", "S"]
],
# Level 10
[
["S", "B", "B", "B", "B", "B"],
["S", "S", "B", "B", "B", "B"],
["S", "S", "S", "B", "B", "B4"],
["S", "S", "S", "S", "B", "B4"],
["S", "S", "S", "S", "S", "B4"],
["W", "W", "W", "W", "W", "B4"]
],
]